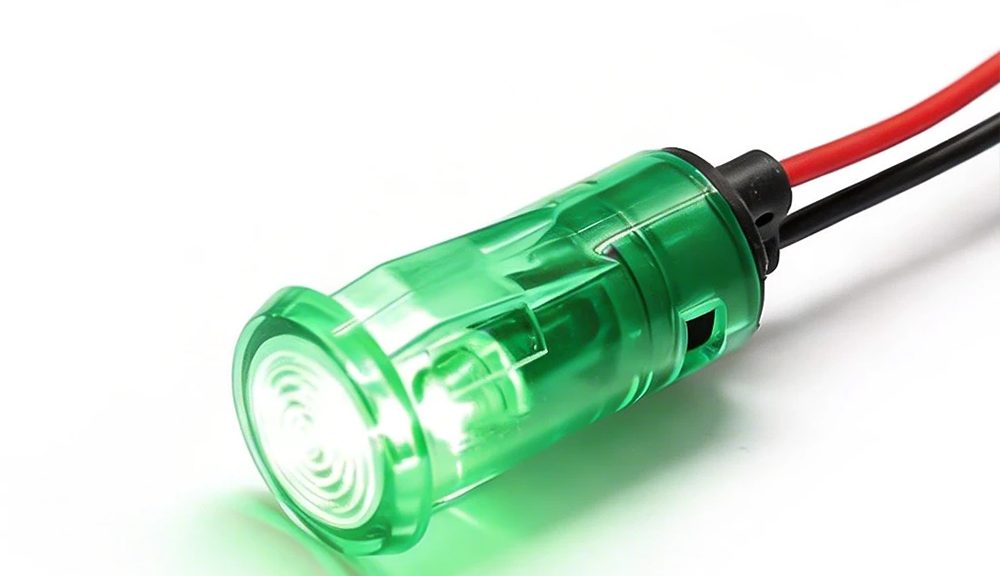
12V 110V 220V 14MM Red LED Mini Indicator Light

Mini Indicator Light development process

In June 2019, a factory producing commercial western food equipment in China approached us and asked us to develop an INDICATOR different from the one on the market, which is mainly used in high-end steam oven and oven.

There are several problems with the old indicator light that they are using now.
The indicator light looks ugly,
1.indicator light is temperature-resistant.
2.indicator light is the pin connection mode, which is very troublesome.
3.indicator light is cream foam, short life and bad color.

indicator light is not waterproof.
There is a lot of water vapor in the kitchen for a long time, which causes the indicator light to burn off.

In particular, the life of indicator light is too short, so they often go to customers for repair for a small indicator light, which has a great impact on their company’s brand and they have to pay very high maintenance costs.

Moreover, their previous indicator light suppliers were not very professional in producing indicator light and could not provide them with many professional instructions.

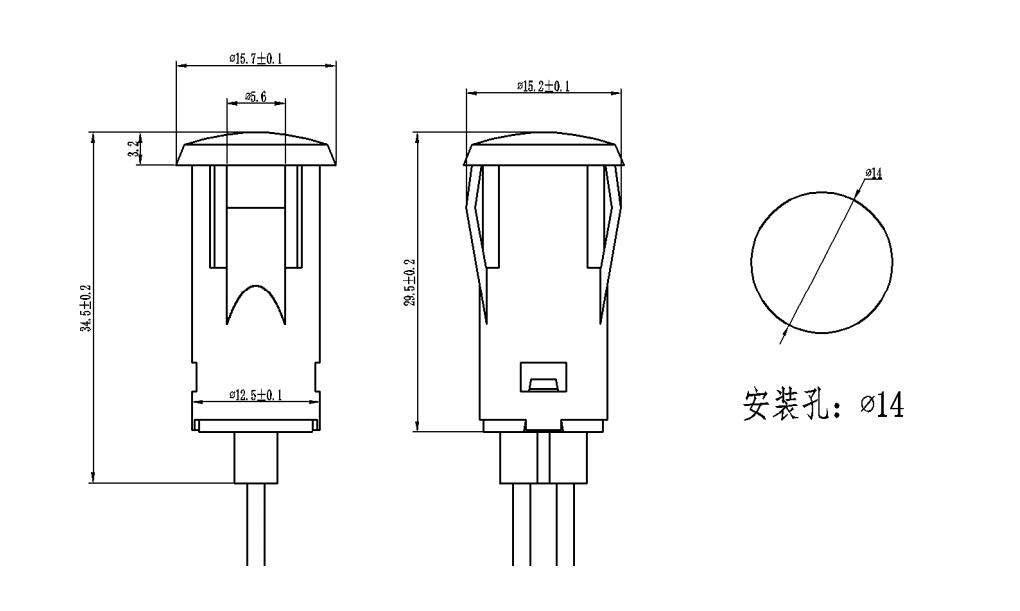
Therefore, FILN’s indicator light engineers customized an LED mini indicator light with 14MM installation hole and IP67 with direct cable according to customers’ needs.

Here are the details of this LED mini indicator light:
mini indicator light is the most important component, just like the human heart.

This mini indicator light uses infinite LED, with a service life of 50,000 hours, usually 6 to 10 years. The LED mini indicator light has a strong LIGHT source, so its brightness is very beautiful.

Mini Indicator Light

LED USES infinite, so when the production of 110V ac more than 4007 capacitor can be added, add a resistance of the same power can be.

If it is 12V 24V DC, there is no need to divide the positive and negative stages, direct wiring can be.

The LED mini indicator light is waterproof to IP68, so it doesn’t matter if you use it in a wet or wet environment.

This mini indicator light heads in a circle and it emits pretty good light.

The plastic material of red mini indicator light is made of PC and nylon material from Bayer of Germany, which is in line with THE ROSH standard of the European Union.

mini indicator light is used for roasting donkeys in high temperature, so the design of temperature resistance is 220 degrees. The teflon wire is used for temperature resistance of 220 degrees.

LED Mini Indicator Light

Click for product specifications

14MM indicator light can produce voltage of 3V 6V12V24V 36V 48V 110V 120V 220V 380V and so on

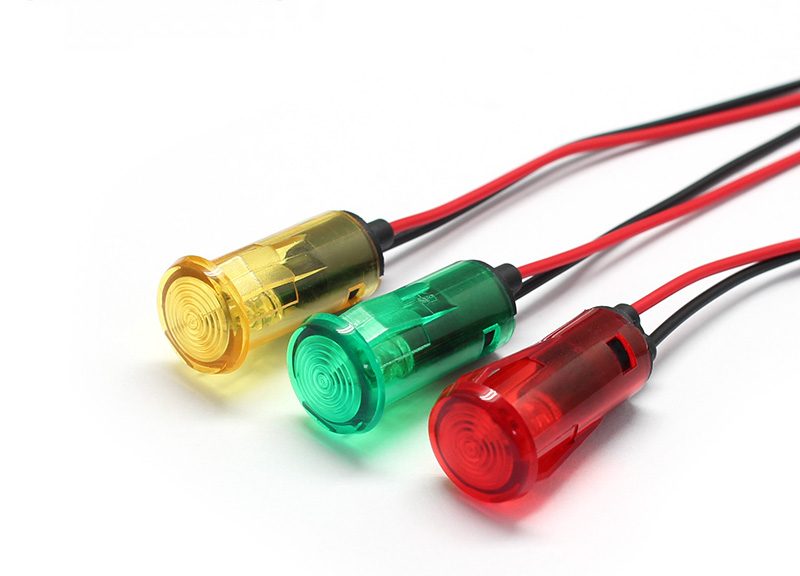
LED indicator light can produce a variety of colors such as red, green, yellow, blue and white

The mini indicator light lasts five years. FILN promises to replace the new mini indicator light free of charge if it breaks within five years.

The LED mini indicator light is installed at a diameter of 14MM, or 0.46 inches

The line of LED mini indicator light can be extended according to customer demand, and any terminal required by the customer can be added at the end of the line.

This LED mini indicator light has been approved by UL of the United States, ROSH of the European Union, and CE of the European Union. If the product is exported to the United States and the European Union, it can be safely used.

The production process of LED INDICATOR LIGHT is to install IS090001 quality management system to ensure the consistency and quality stability of indicator light.

Finally, if you have any customized indicator light and indicators you need, please do not hesitate to contact us at inquiry@cnylin.com.cn.

We are the most professional factory producing indicator light.Plastic indicator light


Welcome to follow us on Facebook


push Button switch manufacturerled pilot light accessories

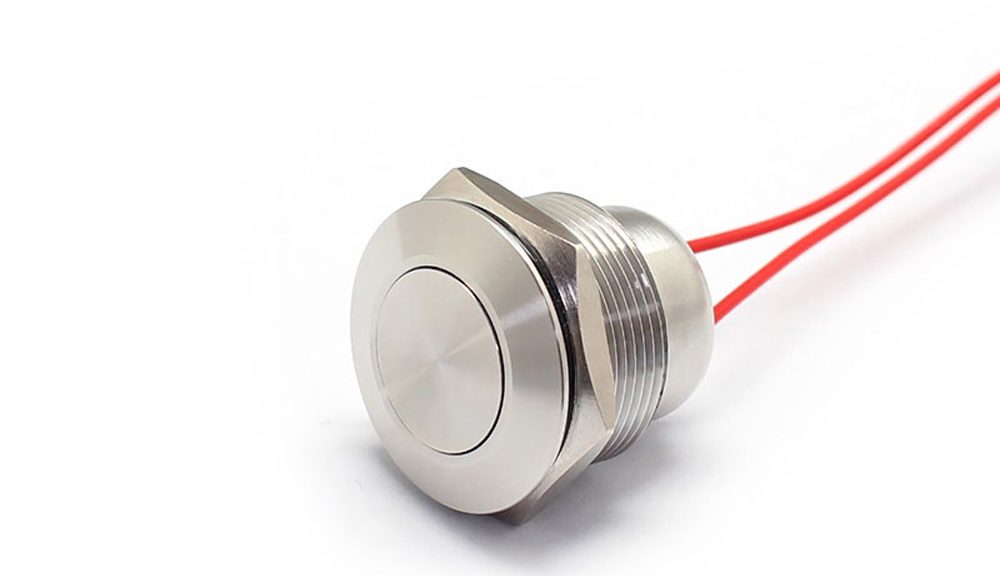
FILN 110V Momentary Push Button Switch Flat Stainless Steel

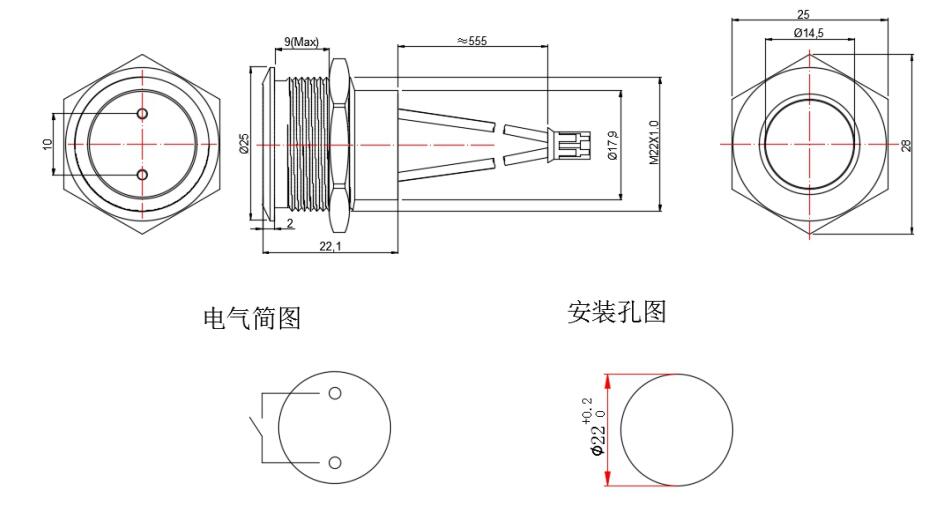
Product Drawing

FILN 110V Momentary Push Button Switch Flat Stainless Steel

110V Momentary Push Button Switch Product Introduction


FILN is an innovative industrial and trade company integrating R&D, production and sales. The company was founded in 1998 and has a history of 21 years.

Now the company has three factories and a trading company.

FILN produces indicator lights, button switches, rocker switches, guitar switches, touch system switches, waterproof micro switches and other products.

FILN is the most complete button manufacturing company in the world, and it is also the only mainland manufacturer in China that has a small indicator light and a button UL certificate.

FILN is the founder of the metal wire buckle category and the creator of the waterproof high-current ship switch.

We are a company with experience and continuous innovation and research and development.

Product Parameters:

Production Series FLM22-FW-3 Light Guide Button
Button Shape round Actuator 304 Stainless steel
Button LED Color Housing Sleeve H59 nickel plated brass/304Stainless steel
Mechanical Life The 500 thousand time Button Pin H62 copper alloy
Electrical Life The 100 thousand time Rubber Ring SIL silica gel
Protection Level IP65 IK08 Nut H59 nickel plated brass
Rated Voltage 220V(AC) Housing PA66+GF20% nylon
Rated Current 10A Light Source
Rated Power 2200W Resistor Metal film
Operating Temperature -25℃~+85℃ Contact AgCdO12

How to wire a push button kill switch with led?

push button kill switch Circuit Configurations

In electrical circuits, how you wire a push button kill switch can affect not only the operation of the switch itself but also connected devices. Here, we explain two different circuit configurations for a push button kill switch, focusing on LED indicators and device operation.

Both circuit setups are viable options depending on your needs, but they offer different advantages and disadvantages. Knowing how the 12V push-button switch operates in each setup helps you choose the right configuration for your application.

Video of other button switch wiring

Customization Advantages of FILN push button kill switch

The FILN push button kill switch is a versatile product that can be customized according to the needs of different customers. This flexibility opens up an array of advantages for users, making it a sought-after component in various applications.

Why Customization is Important for push button kill switch?


Customization is not just a luxury but a necessity in the ever-competitive market. Manufacturers are under constant pressure to provide products that meet specific customer needs. In the case of the FILN push button kill switch, customization has a significant impact in terms of functionality, aesthetics, and adaptability.


  1. Industry requirements differ: Different sectors have different requirements for push button switches. For example, the medical industry might require switches that are easily sterilizable, while the automotive industry may need switches that can withstand harsh conditions.


  1. Consumer Preferences: End-users may prefer specific symbols or lights that make the switches easier to use or identify, enhancing the user experience.


  1. Technological Advances: As technology progresses, the requirement for switches also changes. Customization ensures that the product remains relevant.
FILN 110V Momentary Push Button Switch Flat Stainless Steel

Customizable Button Symbols


One of the most prominent features that can be customized in a FILN push button kill switch is the button symbol. Customers can opt for various light symbols depending on their specific needs.


  1. User Experience: A customized symbol can dramatically improve user experience by providing easy identification of the button’s function.


  1. Branding: Companies can also opt for symbols that align with their brand identity, ensuring consistency in product design.


  1. Regulatory Compliance: In some industries, there are specific symbols that are required by law to ensure safety and compliance.

Customizable Voltage Options


Another crucial aspect of customization is the voltage of the push button switch. FILN offers various voltage options, such as 110v push button switches, to cater to the varied needs of customers.


  1. Geographic Requirements: Different countries have different standard voltages. Custom voltage options allow for the global distribution of products.


  1. Device Compatibility: Customizable voltage ensures that the switches can be easily integrated into different systems without requiring additional components.


  1. Energy Efficiency: The ability to customize voltage can help in creating energy-efficient systems.

Related products:

Push Button Kill Switch: A Comprehensive Guide

Kill switches, essential safety components used in various applications like cars, dirt bikes, guitars, boats, and lawn mowers, provide control and enhanced functionality. Whether you’re looking to wire a waterproof kill switch or install one on a lawn mower, understanding the types, wiring techniques, common issues, and legal considerations is crucial. This comprehensive guide will explore the intricacies of kill switches, including their installation, maintenance, customization options, and user experiences, offering insights and tips for both novices and professionals. Dive into this article to unravel the fascinating world of kill switches and how they can be seamlessly integrated into your daily life.

What is a Push Button Kill Switch, and How Does It Function?

Understanding the Push Button Kill Switch

A push button kill switch is a device that interrupts the power to critical machinery components to provide safety or control. It’s an essential safety feature in various applications such as cars, motorcycles, and machinery. The core concept of the kill switch is simple but vital for ensuring proper control.

Kill Switch in Cars

In automobiles, the push button kill switch, or simply kill switch, is used to cut off the engine’s power in an emergency. This feature can be a lifesaver, providing an immediate response to any unpredictable situation. Learn more about wiring a push button switch for cars here.

Kill Switch in Motorcycles

For motorcycles, the kill switch button plays a vital role in safety. By pressing the button, the engine’s power is cut off, allowing the rider to control the vehicle in unforeseen circumstances.

Momentary Kill Switch in Guitars

A momentary kill switch guitar allows musicians to manipulate the sound by interrupting the signal path momentarily. This effect can create unique sound variations, making it a popular choice for creative artists.

Emergency Stop Buttons

Emergency stop buttons, a type of push button kill switch, are used in various industries to halt machinery operations instantly. They are designed to provide rapid response to potential hazards. You can explore different types of emergency stop buttons here.

Waterproof Kill Switches

Waterproof push button kill switches offer added durability and are often used in environments where they might be exposed to moisture or water. These types of switches are popular in marine applications, outdoor machinery, or even in cars and motorcycles where weather resistance is required. Learn more about waterproof kill switches here.

How to Install a Kill Switch Button in a Car?

Choosing the Right Kill Switch

When installing a kill switch button in a car, it’s essential to select the right type based on the vehicle’s requirements. From simple switches to complex systems with LED indicators, the choice varies.

Wiring the Kill Switch

Wiring a kill switch requires careful planning and following the car’s wiring diagram. Connecting the switch in series with the ignition circuit ensures that it will effectively cut off power when engaged. This guide can help you understand how to wire a push button switch.

Selecting the Mounting Location

The kill switch must be installed in an accessible but discreet location, ensuring easy access during an emergency while remaining concealed to prevent tampering.

Considering the Type of Vehicle

Different vehicles may require specialized kill switches. For example, a race car might need a more robust and responsive system, while a regular passenger car might only require a simple button.

Safety Precautions

Proper insulation and secure connections are vital when installing a kill switch to avoid any electrical faults. Following the manufacturer’s guidelines and seeking professional assistance if needed is advisable.

Integrating with Existing Systems

Some modern cars come with built-in kill switch systems that can be integrated with aftermarket buttons. Understanding the car’s existing wiring and circuitry will aid in the correct installation.

Importance in Car Security

A kill switch isn’t just a safety feature; it can also add an extra layer of security to your vehicle. By disrupting the ignition circuit, it can prevent unauthorized use of the car, effectively acting as an anti-theft device.

Customization Options

Custom kill switch buttons can be designed to match the car’s interior, providing both functionality and aesthetics. Some switches even come with LED indicators for visual feedback.

Momentary Kill Switches for Cars

A momentary kill switch is a type that only interrupts the circuit while being pressed, providing temporary control. These switches are prevalent in specific applications within the automotive industry, such as race cars.

Maintenance and Care

Regular inspection and maintenance of the kill switch ensure that it functions correctly when needed. It includes checking the wiring, connections, and button for wear and tear.

What are the Different Types of Momentary Kill Switches for Motorcycles?

Basics of Momentary Kill Switches

A momentary kill switch in motorcycles is designed to interrupt the engine’s ignition circuit briefly. This feature can be used for safety or control, allowing the rider to manage the motorcycle in various situations.

Types of Momentary Kill Switches

There are different types of momentary kill switches suitable for motorcycles, each with its unique features and applications. Here are some of the most common:

  1. Standard Momentary Kill Switch: This type is a simple push button that cuts off the engine momentarily when pressed. It’s commonly found on various motorcycle models.
  2. Toggle Type Kill Switch: This type allows the rider to switch between the ‘kill’ and ‘run’ modes quickly. It provides more control but can be more complex to install.
  3. Integrated Kill Switch with Starter Button: Some motorcycles feature an integrated kill switch with the starter button, offering a streamlined control interface.
  4. Wireless Kill Switch: A wireless kill switch provides remote control, allowing the rider or even a coach to shut off the engine from a distance. It’s particularly useful in training scenarios.

Considerations for Choosing a Kill Switch

The choice of a kill switch for a motorcycle depends on various factors like the bike’s model, the rider’s preferences, and the intended use (e.g., racing, daily commuting).

Importance of Compatibility

Not all kill switches are compatible with every motorcycle. Ensuring that the chosen switch matches the bike’s make and model is essential for optimal functionality.

Installation Process

Installing a momentary kill switch on a motorcycle requires following specific instructions and possibly making modifications to the existing wiring. Here’s how to connect a push-button switch on a motorcycle.

Safety Features

Some momentary kill switches come with safety features like waterproofing and shock

resistance. These features can be vital for off-road and racing motorcycles.

Customization Options

Custom-designed kill switches can match the motorcycle’s aesthetics, offering both style and functionality.

Maintenance Considerations

Regular inspection, cleaning, and occasional replacement of the momentary kill switch ensure that it continues to function as intended.

Some brands specialize in manufacturing kill switches specifically for motorcycles, offering various models to suit different needs. Find suitable momentary kill switch options here.

How to Wire a Momentary Kill Switch for a Guitar?

Introduction to Guitar Kill Switches

A momentary kill switch for a guitar allows the musician to temporarily cut the sound by pressing a button. This effect can be used creatively to produce staccato-like sounds and other effects.

Choosing the Right Kill Switch

The choice of a kill switch for a guitar depends on the type of guitar, the desired sound effects, and the musician’s preferences. There are various models available, including simple push-button types and more complex toggle switches.

Wiring Process

Wiring a momentary kill switch to a guitar involves connecting it to the guitar’s pickup and output jack. This process requires careful soldering and understanding of the guitar’s circuitry. Here’s a guide to wire a push-button starter switch.

Positioning the Kill Switch

The kill switch should be installed in a location that is easily accessible while playing, yet doesn’t interfere with the regular playing technique. It might require drilling a hole in the guitar’s body for mounting.

Special Types of Kill Switches

Some kill switches are designed specifically for certain types of guitars or playing styles, such as the EMG TKO kill switch. Choosing a specialized switch may enhance the instrument’s functionality.

Connecting with Other Effects

A momentary kill switch can be combined with other guitar effects like distortion or delay to create unique sounds. Proper wiring and integration are crucial for achieving the desired results.

Maintenance and Care

Regular inspection and maintenance of the kill switch ensure smooth operation. Any signs of wear or faulty connections should be addressed promptly to avoid performance issues.

There are various brands offering momentary kill switch options for guitars, ranging from budget-friendly choices to professional-grade models.

Customizing the Look

Some musicians choose to customize the appearance of the kill switch to match the guitar’s design. This customization can add a personal touch to the instrument.

Understanding the EMG TKO Kill Switch

The EMG TKO kill switch is a popular option among guitarists, known for its reliable performance and sleek design. It’s designed for easy installation and offers precise control over the sound.

What are the Key Features of EMG TKO Kill Switch?

Introduction to EMG TKO Kill Switch

The EMG TKO kill switch is a specialized kill switch designed for guitars. It’s known for its high quality, ease of use, and the unique sound effects it can create.

Key Features

  1. Ease of Installation: The EMG TKO kill switch is designed for easy installation, with clear instructions and necessary components included.
  2. Durability: Built with robust materials, the EMG TKO kill switch is meant to withstand rigorous use, making it suitable for both studio recording and live performances.
  3. Sound Control: With precise control, the EMG TKO kill switch allows musicians to create unique sound effects, ranging from subtle staccato patterns to more aggressive sound manipulations.
  4. Compatibility: The EMG TKO kill switch is compatible with various types of guitars, providing flexibility for musicians with different instruments.
  5. Aesthetics: Available in different designs and finishes, the EMG TKO kill switch can add a sleek touch to the guitar’s appearance.

FILN 110V Momentary Push Button Switch Flat Stainless Steel

Application in Different Music Genres

The EMG TKO kill switch is versatile and can be used in different music genres, including rock, metal, jazz, and more. Its flexibility makes it a favored choice among various musicians.

Installation Considerations

While the EMG TKO kill switch is designed for ease of installation, it might require some basic soldering skills or professional assistance for optimal performance.

Combining with Other Sound Effects

The EMG TKO kill switch can be combined with other guitar effects like pedals and amplifiers, allowing musicians to explore new soundscapes and create unique musical expressions.

Cost and Availability

The EMG TKO kill switch is available at various price points, catering to both amateur musicians and professionals. Finding the right model that fits the budget and requirements is essential.

User Reviews and Opinions

Musicians who have used the EMG TKO kill switch often praise its reliability, sound control, and overall quality. It has become a go-to choice for many guitarists looking to enhance their instruments.

Alternative Options

While the EMG TKO kill switch is popular, there are other options available in the market. Comparing features, prices, and user reviews can help in making an informed choice.

Connection with Other EMG Products

The EMG TKO kill switch is part of a broader range of products offered by EMG, including pickups and other accessories. It can be integrated seamlessly with other EMG products for a cohesive setup.

Maintenance and Warranty

Regular care and maintenance of the EMG TKO kill switch ensure its longevity. Many models come with a warranty, providing additional peace of mind to the users.

How Does a Momentary Kill Switch Operate in a Car?

Introduction to Momentary Kill Switch in Cars

A momentary kill switch in a car is designed to temporarily cut off the engine’s power when pressed. Unlike a regular kill switch that maintains the ‘off’ position, a momentary kill switch only interrupts the circuit while being pressed.

How It Works

A momentary kill switch works by breaking the electrical connection to the ignition circuit momentarily. When the button is pressed, the circuit is open, cutting off power. Releasing the button restores the connection, resuming normal

operation.

Benefits of a Momentary Kill Switch in Cars

  1. Security: By installing a momentary kill switch, the car owner can enhance security, making it difficult for unauthorized users to start the engine.
  2. Safety: In case of an emergency, the momentary kill switch can be used to quickly shut down the engine, reducing the risk of accidents or damage.
  3. Convenience: Some car owners prefer the tactile feel of a physical kill switch as a start/stop button for the engine, providing a sporty driving experience.

Installing a Momentary Kill Switch in Cars

Installation of a momentary kill switch in cars requires careful planning and understanding of the car’s electrical system. It should be connected to the ignition circuit, and professional installation may be recommended. Here’s a guide on how to wire a push-button switch with LED.

Choosing the Right Momentary Kill Switch

Selecting the appropriate momentary kill switch for a car depends on the car model, the desired functionality, and personal preferences. Various options are available, ranging from simple push-button switches to more complex designs with integrated LEDs.

Maintenance and Inspection

Regular inspection and maintenance of the momentary kill switch are vital to ensure that it continues to function properly. Any signs of wear or damage should be addressed promptly.

Integration with Other Car Systems

A momentary kill switch can be integrated with other car systems, such as alarms or remote starters. This integration can enhance functionality and provide a more cohesive user experience.

In some jurisdictions, specific regulations might govern the installation and use of momentary kill switches in cars. Compliance with local laws and regulations is essential.

Cost and Availability

The cost of a momentary kill switch for a car can vary based on the design, functionality, and brand. Finding the right option that suits the budget and requirements is key.

User Reviews and Experiences

Car owners who have installed momentary kill switches often highlight the enhanced control, security, and unique driving experience they provide.

Several brands offer momentary kill switch options for cars, catering to different needs and preferences. Explore a wide range of momentary car push-button ignition switches here.

Customization Options

Some car owners choose to customize the appearance and functionality of the momentary kill switch to match their vehicle’s aesthetics and personal preferences.

How to Wire a Dirt Bike Kill Switch?

Introduction to Dirt Bike Kill Switch Wiring

A kill switch on a dirt bike is an essential safety feature that allows the rider to quickly shut off the engine in case of an emergency. Understanding how to wire a kill switch is crucial for both installation and maintenance.

Types of Dirt Bike Kill Switches

Different types of kill switches are available for dirt bikes, ranging from simple push-button switches to more advanced designs with additional features like integrated lights.

Wiring Diagrams and Guides

Wiring a dirt bike kill switch requires understanding the bike’s electrical system and following a specific wiring diagram. This wiring diagram guide can assist in connecting a push-button switch.

Choosing the Right Kill Switch

Selecting the appropriate kill switch for a dirt bike depends on various factors, including the bike’s make and model, the intended use (racing, trail riding, etc.), and personal preferences.

Installation Process

Installing a dirt bike kill switch involves connecting it to the bike’s ignition system. Proper soldering and connection techniques are vital to ensure reliable performance.

Positioning the Kill Switch

The kill switch should be installed in a location that is easily accessible during riding yet doesn’t interfere with the rider’s normal operation of the bike.

In some regions, specific regulations might govern the use of kill switches on dirt bikes. Compliance with these laws ensures the rider’s safety and legality of the bike.

Maintenance and Inspection

Regular inspection, cleaning, and maintenance of the kill switch are essential to ensure that it functions correctly when needed.

Customization Options

Custom-designed kill switches can match the aesthetics of the dirt bike, providing a cohesive look and adding personal touches to the machine.

Various brands specialize in manufacturing kill switches for dirt bikes, catering to different needs and preferences.

Common Issues and Troubleshooting

Understanding common issues with dirt bike kill switches and how to troubleshoot them can save time and prevent potential safety risks. Regular inspection helps in early detection of problems.

How to Wire an EMG Killswitch?

Introduction to EMG Killswitch Wiring

EMG is a well-known brand offering specialized kill switches for guitars, known as EMG killswitches. Wiring an EMG killswitch requires specific knowledge and techniques to ensure optimal performance.

Types of EMG Killswitches

EMG offers various types of killswitches, including push-button and toggle designs. Choosing the right type depends on the guitar, desired sound effects, and personal preferences.

Wiring Process

Wiring an EMG killswitch involves connecting it to the guitar’s circuitry, including pickups and output jack. Following the provided instructions and using proper soldering techniques is essential.

Compatibility Considerations

EMG killswitches are designed to be compatible with various guitar models and types. However, checking compatibility before purchase and installation is recommended.

Positioning the EMG Killswitch

The positioning of the EMG killswitch on the guitar is crucial for ease of use and aesthetic considerations. It might require custom drilling or modification of the guitar body.

Integrating with Other EMG Products

EMG killswitches can be integrated seamlessly with other EMG products, such as pickups and preamps. This integration can provide a cohesive sound experience.

Customization and Aesthetics

EMG killswitches are available in different designs and finishes, allowing musicians to match them with their guitars’ appearance and add personal touches.

Maintenance and Care

Regular inspection, cleaning, and maintenance of the EMG killswitch ensure smooth operation and longevity.

User Reviews and Experiences

Musicians who have installed EMG killswitches often praise their quality, ease of installation, and unique sound effects they provide.

EMG offers various models of killswitches, catering to different needs, preferences, and budget considerations.

Common Issues and Troubleshooting

Understanding common issues with EMG killswitches and how to troubleshoot them can enhance the user experience and ensure reliable performance.

EMG killswitches come with specific warranties and legal considerations. Being aware of these aspects ensures proper usage and support when needed.

How Do You Make a Waterproof Kill Switch?

Introduction to Waterproof Kill Switches

Waterproof kill switches are designed to withstand moisture and water exposure, making them suitable for applications like boats, outdoor equipment, and wet environments. Creating a waterproof kill switch requires specific techniques and materials.

Choosing the Right Materials

Selecting materials that resist water and corrosion is essential for creating a waterproof kill switch. This includes using seals, gaskets, and coatings that prevent moisture ingress.

Design Considerations

The design of

a waterproof kill switch must consider factors like the expected water exposure level, temperature fluctuations, and mechanical stresses.

Wiring and Connections

Wiring a waterproof kill switch requires special care to ensure that connections are sealed and protected from water. Using proper connectors and sealing techniques is crucial.

Integration with Other Systems

Waterproof kill switches can be integrated with other systems, such as alarms or safety mechanisms, to enhance functionality in wet environments.

Maintenance and Inspection

Regular inspection and maintenance of waterproof kill switches are vital to ensure continued water resistance and reliable operation.

Customization Options

Custom-designed waterproof kill switches can match specific applications and requirements, including aesthetics, functionality, and regulatory compliance.

Several brands specialize in manufacturing waterproof kill switches, catering to different applications and preferences.

Common Issues and Troubleshooting

Understanding common issues with waterproof kill switches and how to troubleshoot them ensures that they continue to function properly in wet conditions.

Specific regulations might govern the use and installation of waterproof kill switches in some applications. Compliance with these laws is essential.

User Reviews and Experiences

Those who have used waterproof kill switches often highlight their reliability, durability, and suitability for various applications.

How Do You Wire a Kill Switch on a Lawn Mower?

Introduction to Lawn Mower Kill Switch Wiring

Wiring a kill switch on a lawn mower is an essential safety feature that allows the operator to quickly shut off the engine. Proper installation and wiring are vital for effective operation.

Types of Lawn Mower Kill Switches

Different types of kill switches are available for lawn mowers, including toggle, push-button, and key-operated designs. Choosing the right type depends on the mower model and personal preferences.

Wiring Diagrams and Instructions

Wiring a lawn mower kill switch requires following specific diagrams and instructions, depending on the mower’s make and model. Proper connections and soldering techniques are essential.

Choosing the Right Kill Switch

Selecting an appropriate kill switch for a lawn mower depends on factors like the mower’s engine type, safety requirements, and personal preferences.

Positioning the Kill Switch

The kill switch should be installed in a location that is easily accessible to the operator without interfering with normal operation.

Integration with Other Safety Features

A lawn mower kill switch can be integrated with other safety features, such as blade brakes, to enhance the overall safety of the machine.

Maintenance and Inspection

Regular inspection, cleaning, and maintenance of the kill switch are essential to ensure that it functions correctly and remains safe to use.

Customization Options

Custom-designed kill switches can match the aesthetics of the lawn mower, providing a cohesive look and adding personal touches to the machine.

Common Issues and Troubleshooting

Understanding common issues with lawn mower kill switches and how to troubleshoot them can prevent downtime and ensure safe operation.

Specific laws and regulations might govern the use of kill switches on lawn mowers. Compliance with these rules is essential to ensure safety and legality.

Various brands offer kill switch options for lawn mowers, catering to different needs, preferences, and budget considerations.

Conclusion

Kill switches play a critical role in various applications, providing safety, control, and enhanced functionality. Whether used in cars, dirt bikes, guitars, boats, or lawn mowers, understanding how to wire and properly utilize kill switches is vital. By choosing the right materials, following proper wiring techniques, and adhering to legal considerations, kill switches can be a valuable addition to various devices and machinery. With a myriad of options available, selecting the appropriate kill switch for specific needs and preferences is key. Regular maintenance, customization options, and understanding common issues further enhance the user experience and reliability of kill switches.

How Much Does a Push Button Kill Switch Cost?

When it comes to finding a push button kill switch, the price can vary depending on the retailer and the specific features of the product. In this article, we will explore the approximate price ranges from major retailers like Home Depot and Amazon, as well as other potential options.

Breakdown by Retailer

Home Depot

Home Depot is a well-known retailer that offers a wide range of electronic components, including push button kill switches. Based on our research, the price range for these switches at Home Depot is typically between $10 and $50. However, it’s important to note that the exact price may vary depending on the specific model and its features.


Home Depot is a great destination for a variety of push button kill switches. Their selection and competitive pricing make them a reliable option for customers.

Amazon

As one of the largest online marketplaces, Amazon also offers a diverse range of push button kill switches. The prices on Amazon can range from approximately $5 to $30, depending on the model and features of the switch.


Amazon provides convenient shopping for a wide variety of push button kill switches. With their extensive selection and competitive pricing, customers can find the perfect switch for their needs.

Other Retailers

In addition to Home Depot and Amazon, there are other electronic components distributors and retailers that may offer push button kill switches. However, specific pricing details for these retailers were not available during our research.

Conclusion

In conclusion, the price of a push button kill switch can vary depending on the retailer and the specific features of the product. Based on our research, the average price at Home Depot is around $30, while on Amazon, it is around $17.5. It is always recommended to check with the respective suppliers, retailers, or online marketplaces for the most accurate and up-to-date pricing information.

Table:

Retailer Price Range Mid-Range Price
Home Depot $10 – $50 $30
Amazon $5 – $30 $17.5
Other Retailers Not Available N/A

When searching for a push button kill switch, consider your budget and the specific features you require. By comparing prices from different retailers, you can find the best option that meets your needs.

The company specializes in manufacturing various types of products: push button switches, toggle switches, rocker switches, and other series of products suitable for household appliances, instruments, electronic toys, etc. It is especially suitable for various kitchen equipment, such as commercial stoves, commercial steaming cabinets, and disinfection cabinets. It has stable cooperative relations with medium and large enterprises all over the country and has stable business exchanges and cooperation with more than 200 different countries and regions around the world. Relationship, looking forward to your cooperation, please contact inquiry@cnylin.com.cn.

110v momentary push button switch specifications:

1. 110v momentary push button switch mounting hole size is 22mm.

2. The waterproof rating of 110v momentary push button switch is IP67.

3. The current of the 110v momentary push button switch is 5A 250V.

4. 110v momentary push button switch materials include nickel-plated brass, stainless steel and aluminum alloy. Aluminum alloy materials can oxidize various colors, such as red, green, yellow, blue, and black.

5. The appearance of the 110v momentary push button switch is very atmospheric and beautiful.

6. The head of the 110v momentary push button switch has a ball head, a high head and a flat head.

7. 110v momentary push button switch has self-locking function.


110v momentary push button switch product features:


110v momentary push button switch, stainless steel button, one-shot molding, tightly assembled and seamless, 22 m exquisite appearance, strong and beautiful.

110v momentary push button switch, the tail can be wired, and pure copper pins can be used for stable contact.

110v momentary push button switch, thoughtful design on the tail, with wire, waterproof grade can reach IP67, multiple waterproof equation design, keep away from hidden dangers. It can be used in various places, and there is no limit to the use environment.

110v momentary push button switch, reset design to meet various useful functions and environmental needs.

110v momentary push button switch, the mechanical life can reach more than 100,000 times.

110v momentary push button switch, the tail wire can be extended according to customer needs, and customized welding terminals can be processed.


110V Momentary Push Button Switch Question


– Q: What certification does 110v momentary push button switch have?

– A: The button has UL CCC CE and other certifications.


– Q: Where is the 110v momentary push button switch button used?

– A: Used in automatic machinery, electronic products, toy products, etc.


– Q: Is the 110v momentary push button switch selling well?

– A: Because of the high cost performance, the buttons sell very well, and they are the best sellers on Amazon and eBay.


– Q: What is the maximum current of 110v momentary push button switch?

– A:: The maximum current of the button can be 10A.


– Q:What is the warranty period of 110v momentary push button switch?

– A: The warranty period of these buttons is two years.


– Q: Can 110v momentary push button switch be customized?

– A: Filn can customize various buttons according to customer requirements.


Common problem:

Do you have a catalog? Can you check the catalog for me?

Yes, we have a product catalog. Please contact us online or email inquiry@cnylin.com.cn.

Can you provide samples?

Yes, we can provide samples.
We charge a sample fee (1-3pcs), and the shipping fee is paid by you. When you place order normally. We will refund the sample fee to you. ”

Which payment method do you accept?

We accept wire transfers, Western Union and PayPal, credit cards. Please make sure that we can receive an invoice for the same amount.

What about your delivery time?

We have many stocks. We can send stock products within 3 working days.
If there is no stock or the stock is insufficient, we will check the delivery date with you. Will be updated to you within 48 hours

How do I ship my order? Is it safe?

We use express for small packages, such as DHL, FedEx, UPS, TNT. That is door-to-door service.
For large packages, we will use air or sea freight. We will properly pack to ensure safety.
Security. We will be responsible for any damage caused during delivery.

The following is a little knowledge about this wireless push button switch express delivery

1: Global transportation. (Except for certain countries and APO/FPO)

2: After payment verification, the order will be processed in time.

3: We only ship to the confirmed order address, and your order address needs to match your delivery address.

4: The picture shown is for reference only.

5: The service transportation time is provided by the carrier, excluding weekends and holidays. The transportation time is different, especially during the holidays.

6: If you still have not received the goods within 30 days of payment, please contact us in time, we will track the goods and reply to you as soon as possible, our goal is to satisfy customers.

7: Due to differences in inventory status and time, we will choose to ship with our first available warehouse and express delivery.

If you have any needs for customized LED indicators, please email us sales2@filn.com.cn, if you have any problems with push button switches, please email our technical department inquiry@cnylin.com .cn.

Product Purchase Link

Hot product: 110v indicator light

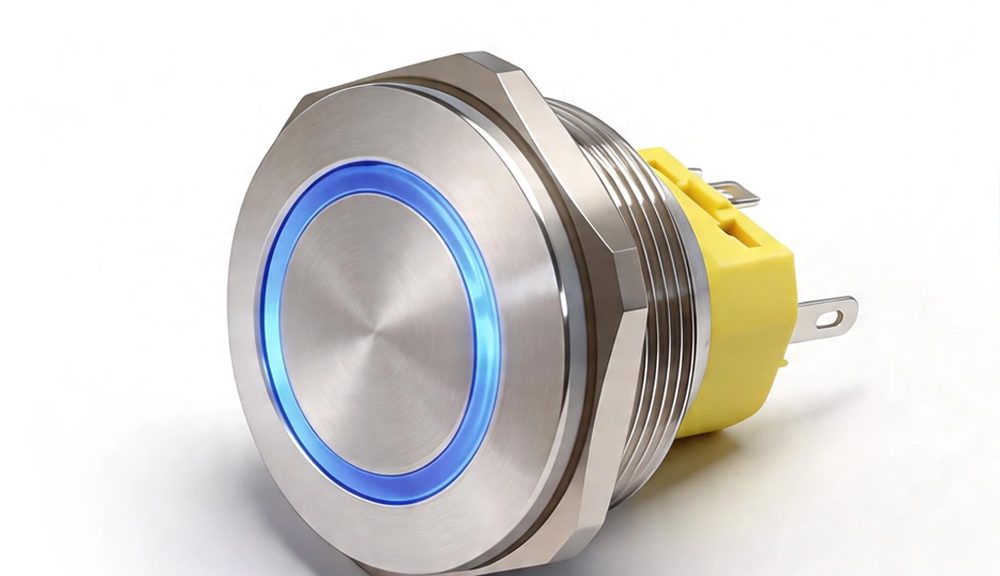
28MM LED Ring Button Metal Push Button Power Switch

28MM LED Ring Button Metal Push Button Power Switch

Product Drawings:

An LED ring button is a pushbutton device equipped with a ring of LED lights.

It has the appearance of a pushbutton switch consisting of a ring of LEDs surrounding the button.

Pushbuttons are typically used to trigger an action or perform a specific function, while LED rings are used to provide visual indication or status feedback, and can also help you to beautify your installation.

Product Parameters:

Production Series FLM30-20FEJM Light Guide Button PC plastic
Button Shape round Actuator 304 Stainless steel
Button LED Color Red blue green yellow white Housing Sleeve H59 nickel plated brass/304Stainless steel
Mechanical Life The 500 thousand time Button Pin H62 copper alloy
Electrical Life The 100 thousand time Rubber Ring SIL silica gel
Protection Level IP67 IK08 Nut H59 nickel plated brass
Rated Voltage 220V(AC) Housing PA66+GF20% nylon
Rated Current 3A Light Source LED
Rated Power 660W Resistor Metal film
Operating Temperature -25℃~+85℃ Contact AgCdO12

FILN Pushbutton Switch Customization

Our cutting-edge product combines the functionality of a metal button switch with an eye-catching circular LED light arrangement. Whether you need an on/off button, control button, or menu navigation button, our LED ring button is the perfect solution for your electronic devices and applications.

Designed to provide intuitive user interaction, the LED ring button utilizes a touch-sensitive interface. With a simple touch or press, users can effortlessly trigger specific actions, thanks to the responsive functionality of our button switch.

What sets our LED ring button apart is its vibrant visual feedback system. The LED ring features a wide range of colors, adjustable brightness levels, and captivating blinking patterns. This allows for clear and dynamic communication of device status, connectivity information, and different operational modes. Users can easily interpret and respond to these visual cues, enhancing their overall experience.

Crafted with precision and durability in mind, our 28mm LED ring button boasts a sturdy metal construction. It is built to withstand the demands of various environments and applications, ensuring reliable performance and longevity.

At FILN, we understand the importance of seamless integration into different products and industries. That’s why our LED ring buttons find applications in consumer electronics, computer equipment, smart homes, and industrial controls. Whatever your specific needs, our LED ring button provides a versatile and user-friendly solution.

Upgrade your user interface with FILN’s 28mm LED Ring Button and revolutionize the way users interact with your products. Experience the perfect blend of functionality, aesthetics, and durability. Choose FILN for your LED ring button needs and stay ahead of the curve in the world of electronic devices and applications.

The sleeve housing material of this 28 mm push button power switch is mainly stainless steel. The stainless steel housing has high corrosion resistance and chemical stability. It is suitable for use in harsh environments without rapid rust.

The sleeve material is also nickel-plated brass and black zinc-aluminum alloy, but these two are not commonly used materials for our large-size push button power switches. If customers want these two materials, we need to customize them. Delivery time It will take a little longer. Among them, the brass nickel-plated shell looks a little yellow and looks brighter, and the price is relatively high; the black zinc-aluminum alloy looks very beautiful in appearance, suitable for use in electrical appliances that require black buttons.

There are four main types of conventional push button power switch functions in the market, which are 1NO, 2NO, 1NO1NC, and 2NO2NC. The switch functions of this 28 mm push button power switch are 1NO1NC and 2NO2NC.

Push Button Switch Wiring Method:

For 1NO1NC, we have the following 4 wiring methods:

1.In the static state, the light of push button power switch is off and the device does not work. When the button switch is pressed, the light of push button power switch lights up and the device starts to run.

28MM LED Ring Button Metal Push Button Power Switch

2.In the static state, the light of the push button power switch is on and the device is running. When the button switch is pressed, the light of the push button power switch goes out and the device stops operating.

28MM LED Ring Button Metal Push Button Power Switch

Introducing FILN’s 28mm LED Ring Button, a versatile and high-quality metal button switch with an integrated LED light ring. Our product offers flexible connection options based on your specific requirements. Choose between 2NO2NC (two groups of 1NO1NC) for controlling multiple devices or follow the provided connection diagram for seamless integration.

Our push button power switch comes with two essential functions: self-locking and self-resetting. The self-locking feature ensures that the button remains pressed until pressed again, while the self-resetting function automatically returns the button to its original position upon release. You can select the desired function based on your unique needs.

The LED lights in our push button power switch are available in monochromatic colors such as red, yellow, blue, green, and white. Additionally, we offer two-color options like red and green or red and yellow, as well as three-color combinations including red, green, and blue. Our monochrome LEDs deliver superior quality and eliminate the need to distinguish between positive and negative poles. Customers have the freedom to connect the two lamp pins as per their preference.

With an IP65 waterproof rating, our push button power switch ensures reliable performance even in challenging environments. If you require a higher waterproof rating like IP67, we recommend exploring FILN’s button with a cord. This variant features a direct wiring mechanism with black waterproof glue coating for enhanced protection, elevating the waterproof level to IP67 for outdoor applications.

To expand our market presence, especially in foreign trade, FILN has diligently worked to obtain various certifications. Our push button power switch series now holds UL, RoHS, and CE certifications, establishing a reputable position in the button market.

Experience the reliability and functionality of FILN’s 28mm LED Ring Button. With its premium metal construction, integrated LED light ring, and customizable features, it is an ideal choice for various applications. Choose FILN and stay ahead with our innovative solutions.

Related products:

Frequently asked questions about the 28MM LED Ring Button:

  1. Can this push button power switch be made in two-color and three-color? FILN offers two-color and three-color LED ring buttons. The two-color options include red, green, red and yellow, while the three-color options include red, green, blue, red, yellow, and blue lights. These buttons have a voltage range of 3-220V. Two-color and three-color functions can be customized as either common cathode or common anode, depending on your requirements. Additionally, larger-sized push button power switches can incorporate two or three lamp beads inside the button to create two-color or three-color effects. In such cases, there is no distinction between common cathode and common anode, and the light wires can be connected arbitrarily within the voltage range of 3-220V.
  2. What is the current rating of this push button power switch? The current rating of this 28mm push button power switch is 5A, as are the 19mm-40mm buttons. However, we also offer the option to customize a 10A button upon request. Please feel free to contact us if you are interested in this customization.
  3. Does this push button power switch come with after-sales service? FILN has a comprehensive after-sales service system in place. This push button power switch comes with a 5-year warranty period. Should any issues arise during this warranty period, customers can contact us at any time. We are committed to promptly addressing any product quality problems or concerns encountered during use.
  4. Can this push button power switch have a high head? Yes, this push button power switch is available in different head styles, including flat-head, high flat head, and ball head. Flat-head and high flat head options are more commonly used. If you require illuminated buttons, we offer variants such as flat-head ring lights, high head ring lights, flat-head ring lights with power symbols, and high head ring lights with power symbols.
  5. Can the wire be soldered to the tail of this push button power switch? Certainly! If you provide us with your specific connection requirements, we can solder the wire accordingly. Please share the wire gauge and length needed for the soldering process. To ensure quality, we conduct two inspections: one after button installation and another after wire soldering. This guarantees that the button leaves the factory in excellent condition. By taking care of the wire soldering process, we help reduce your time and labor costs while enabling you to achieve higher profits. Additionally, we offer a wire harness connector option that simplifies installation. Different pins correspond to wires of different colors, with a standard wire gauge of 0.5mm² and default wire length of 20cm. Customization of wire gauge and length is also available based on your requirements.

If you have any further questions, ideas, or interest in our 28mm LED ring button, please don’t hesitate to contact us. We strive to respond to all emails within 12 hours.

14mm 12V 220V 110 Volt LED Indicator Lights

Product Drawing

14mm 12V 220V 110 Volt LED Indicator Lights

FILN Indicator Light Introduction

The size of this 12V LED indicator light is 14mm, and the voltage can be customized according to the customer’s needs.

In the US market, FILN manufacturers can produce 110V indicator lights for customers to ensure that they can adapt to the local voltage level.

This plastic 110V indicator light is usually used in Western kitchen equipment, and the surface plastic is designed in a scale-like shape, emitting a very beautiful light.

110 Volt LED Indicator Lights FAQs and Insights


In a world powered by electricity, the unassuming brilliance of 110 Volt LED Indicator Lights emerges as a beacon of efficiency and clarity. As we navigate through intricate circuits, dynamic machinery, and vehicle dashboards, these lights silently communicate crucial information, offering a visual language that transcends industries. From unraveling the intricacies of their wiring to deciphering their role in circuit design and outdoor environments, this comprehensive exploration delves into the world of indicator lights. Get ready to illuminate your understanding as we address the most pressing questions, shed light on versatile applications, and reveal the art of customization. Join us on this enlightening journey through the heart of 110 Volt LED Indicator Lights and unlock a new perspective on the power of illumination.


Introduction


In a world where electricity powers almost every aspect of our lives, indicator lights play a crucial role in providing visual cues about the status of electrical systems and devices. Among these, 110 Volt LED Indicator Lights have gained significant attention due to their energy efficiency and reliability. Whether you’re an electrical enthusiast, a DIYer, or a professional in the field, understanding these indicator lights is essential. This article aims to address the most frequently asked questions about 110 Volt LED Indicator Lights, providing valuable insights and diverse perspectives.


What are 110 Volt LED Indicator Lights?


110 Volt LED Indicator Lights are small, energy-efficient devices designed to visually indicate the status of electrical circuits or equipment operating at 110 volts. These lights utilize Light Emitting Diodes (LED) as their light source, offering several advantages over traditional incandescent indicator lights. LED consume less energy, have a longer lifespan, and emit brighter and more focused light, making them ideal for various applications.


How do I wire a 110 Volt LED Indicator Light?


Wiring a 110 Volt LED Indicator Light is a straightforward process, but it’s crucial to follow proper safety guidelines and consult the product’s documentation. Here are three perspectives on wiring these indicator lights:


  1. Basic Wiring Steps:

To wire a 110 Volt LED indicator light, follow these general steps:

– Ensure the power source is turned off.

– Identify the positive and negative terminals on the LED indicator.

– Connect the positive terminal to the positive side of the 110-volt power source.

– Connect the negative terminal to the negative side of the power source.

– Secure the connections and insulate them properly.

– Turn on the power to check if the indicator light functions correctly.


  1. Consult the Product Manual:

Different indicator lights may have specific wiring requirements. Always refer to the product manual or documentation provided by the manufacturer. This will ensure that you’re following the correct wiring scheme and using the appropriate connectors.


  1. Safety Precautions:

Before working on any electrical wiring, ensure that the power source is completely disconnected. Use insulated tools and wear appropriate personal protective equipment to prevent accidents. If you’re not confident in your wiring skills, consider seeking assistance from a qualified electrician.


What are the Benefits of 110 Volt LED Indicator Lights?


110 Volt LED Indicator Lights offer a range of benefits that make them a preferred choice in various industries. Here are three perspectives on their advantages:


  1. Energy Efficiency:

LED technology is known for its energy efficiency. 110 Volt LED Indicator Lights consume significantly less energy compared to traditional incandescent indicator lights. This efficiency translates to lower electricity bills and reduced environmental impact.


  1. Longevity and Durability:

LED have a longer operational lifespan than incandescent bulbs. They are more resistant to vibrations and shocks, making them suitable for environments where equipment might experience mechanical stress.


  1. Instantaneous Lighting:

When powered on, LED indicator lights illuminate instantly without the warm-up period required by traditional bulbs. This quick response time ensures that the user receives immediate feedback about the status of the system.


What Applications Are Suitable for 110 Volt LED Indicator Lights?


110 Volt LED Indicator Lights find applications in a wide range of industries and scenarios. Here are three perspectives on suitable applications:


  1. Industrial Equipment:

These indicator lights are commonly used in industrial settings to monitor the status of machinery and equipment. Whether it’s indicating whether a machine is running or alerting to a fault, LED indicators enhance operational efficiency.

110 Volt LED Indicator Lights 1

  1. Appliances and Electronics:

Household appliances, such as ovens, refrigerators, and washing machines, often incorporate indicator lights to show when they are operational or in standby mode. In electronics, indicator lights indicate power on/off status or battery charging status.


110 Volt LED Indicator Lights 2

  1. Automotive and Marine:

In vehicles and boats, LED indicator lights serve as essential components to convey crucial information. From indicating turn signals, brake lights, and engine warnings in vehicles to displaying navigation, battery, and engine indicators in marine environments, these lights play a pivotal role in safety.

14mm 12V 220V 110 Volt LED Indicator Lights


How Do Weatherproof 110 Volt LED Indicator Lights Work?


Weatherproof 110 Volt LED Indicator Lights are designed to withstand outdoor conditions and exposure to the elements. Here are three perspectives on their functionality:


  1. Sealed Enclosures:

Weatherproof indicator lights are housed in sealed enclosures that prevent moisture, dust, and other contaminants from entering the internal components. This enclosure is typically made of durable materials such as polycarbonate or stainless steel.


  1. Gasket Seals:

These indicator lights feature gasket seals that create a watertight barrier between the enclosure and the lens. This prevents water from seeping into the light assembly, ensuring its functionality even in rainy or humid conditions.


  1. UV Resistance:

Weatherproof indicator lights are often treated with UV-resistant coatings. This protects the light from the sun’s ultraviolet rays, preventing discoloration, degradation, and loss of visibility over time.


What is the Role of 120 Volt LED Indicator Lights in Circuit Design?


120 Volt LED Indicator Lights are integral components in circuit design, serving various purposes. Here are three perspectives on their role:


  1. Status Indication:

One of the primary functions of 120 Volt LED Indicator Lights is to visually indicate the status of a circuit or equipment. They provide users with real-time information about whether a circuit is active, inactive, or experiencing any issues.


  1. Troubleshooting and Diagnostics:

LED indicator lights aid in troubleshooting electrical systems. When a circuit isn’t working as intended, these lights can help pinpoint the source of the problem. If a light doesn’t illuminate as expected, it indicates that there’s an issue along that specific part of the circuit.


  1. Safety Alerts:

In certain applications, such as high-voltage environments, 120 Volt LED Indicator Lights serve as safety indicators. They warn operators when a circuit is energized, helping prevent accidental contact with live wires and reducing the risk of electric shocks.


How to Choose the Right 110 Volt LED Indicator Light?


Selecting the appropriate 110 Volt LED Indicator Light for your specific needs requires considering several factors. Here are three perspectives on making the right choice:


  1. Brightness and Visibility:

Consider the brightness level of the LED indicator light. Depending on the ambient lighting conditions and the distance from which the light needs to be visible, you might need a higher brightness rating for optimal visibility.


  1. Color Options:

LED indicator lights come in various colors, each representing a different status or condition. Choose a color that aligns with the message you want to convey. For instance, green might signify normal operation, while red indicates an alert or error.


  1. Mounting and Enclosure Type:

Depending on your application, you’ll need to select the appropriate mounting type (panel mount, surface mount, etc.) and enclosure type (standard, weatherproof, explosion-proof, etc.) that suit the installation environment.


What is the Function of 110 Volt LED Indicator Lights in Dashboards?


110 Volt LED Indicator Lights play a vital role in automotive dashboards, providing essential information to the driver.


Here are three perspectives on their functions:


  1. System Warnings:

LED indicator lights on dashboards warn drivers about critical system conditions. These lights may indicate issues like low oil pressure, high engine temperature, or a malfunctioning brake system. They prompt drivers to take immediate action to prevent further damage or accidents.


  1. Safety Alerts:

Indicator lights notify drivers about safety-related matters, such as seatbelt warnings, airbag status, and anti-lock brake system (ABS) activation. These alerts ensure that drivers and passengers are aware of potential risks and can respond accordingly.


  1. Vehicle Status:

LED indicator lights also convey basic vehicle status information. They indicate whether the headlights are on, the turn signals are active, or the vehicle is in park or neutral. This information helps drivers operate their vehicles safely and effectively.


How Can I Customize 110 Volt LED Indicator Lights for Specific Applications?


Customizing 110 Volt LED Indicator Lights involves tailoring their design and functionality to suit specific applications. Here are three perspectives on customization:


  1. Color Customization:

Manufacturers often offer a range of color options for indicator lights. Choose colors that align with the intended message. Customizing colors allows you to establish a clear visual language for your application.


  1. Symbols and Markings:

Some indicator lights come with pre-printed symbols or markings. Alternatively, you can work with manufacturers to create custom symbols that directly convey the desired information to users.


  1. Housing and Enclosure Design:

Custom enclosures can be designed to fit seamlessly into the aesthetics of your product or application. The housing material, shape, and size can be tailored to your needs while maintaining the necessary protective features.


0Are 110 Volt LED Indicator Lights Suitable for Outdoor Use?


110 Volt LED Indicator Lights can be suitable for outdoor use, depending on their design and specifications. Here are three perspectives on their outdoor suitability:


  1. Weatherproof Options:

Weatherproof indicator lights, designed with sealed enclosures and gasket seals, are suitable for outdoor use. They can withstand exposure to rain, snow, and humidity without compromising their functionality.


  1. IP Rating:

Check the Ingress Protection (IP) rating of the indicator light. An IP rating indicates the degree of protection the light offers against solid particles and liquids. Higher IP ratings indicate better resistance to outdoor conditions.


  1. UV Resistance:

Outdoor indicator lights should have UV-resistant coatings to withstand the damaging effects of sunlight over time. This ensures the longevity and visibility of the light, even in sunny environments.


In the realm of electrical systems and equipment, 110 Volt LED Indicator Lights shine as essential components that provide clear and instantaneous visual feedback. From their wiring to applications, benefits, customization, and outdoor suitability, these indicator lights have a substantial impact on various industries. Whether you’re designing a circuit, enhancing the functionality of a product, or ensuring safety in automotive dashboards, a solid understanding of these indicator lights is invaluable. As technology continues to advance, these lights will likely evolve further, offering even more innovative solutions to the challenges of modern electrical systems.


1How Can I Troubleshoot a Red Indicator Light on My Dashboard?


Encountering a red indicator light on your vehicle’s dashboard can be concerning, as it often signifies an issue that requires attention. Here are three perspectives on troubleshooting a red indicator light:


  1. Refer to the Owner’s Manual:

Your vehicle’s owner’s manual is a valuable resource for understanding the meaning of dashboard indicator lights. It will provide detailed information about what each light represents and what action you should take in response.


  1. Immediate Action:

In cases where a red indicator light indicates a critical issue, such as low oil pressure or engine overheating, take immediate action. Pull over to a safe location and turn off the engine to prevent further damage. Ignoring such warnings could lead to severe engine problems.


  1. Professional Diagnosis:

If you’re uncertain about the cause of the red indicator light or if it remains illuminated after you’ve taken appropriate action, it’s best to consult a qualified mechanic. They can diagnose the issue using specialized tools and experience, ensuring that your vehicle’s systems are functioning properly.

4.Insights from Indicator Light.com

For more detailed information about specific 110 Volt LED Indicator Lights, you can explore the insights provided on IndicatorLight.com. This platform offers a comprehensive range of indicator lights with various specifications and features, catering to different industries and applications. Each product listing includes essential details such as voltage, size, IP rating, and more, helping you make informed decisions about your indicator light needs.

5.Final Thoughts

110 Volt LED Indicator Lights are much more than just small illuminated devices; they’re integral components that convey essential information and enhance safety across numerous sectors. Whether you’re working on an industrial machine, driving a vehicle, or designing electronic systems, these indicator lights play a crucial role in delivering real-time status updates and warnings. As technology continues to advance, these lights will likely become even more efficient, versatile, and innovative, addressing the evolving needs of our electrified world.

In this article, we’ve covered a range of frequently asked questions and provided insights from various perspectives. From understanding their wiring and benefits to exploring applications and customization options, you now have a comprehensive understanding of the significance of 110 Volt LED Indicator Lights. Remember to consult reputable sources like (IndicatorLight.com](https://www.indicatorlight.com/) for detailed product information and stay up-to-date with the latest advancements in indicator light technology.


110 Volt LED Indicator Lights Price in the USA

When it comes to finding the perfect 110 Volt LED Indicator Lights in the USA, it’s essential to consider the price range. In this article, we will explore different options and their corresponding prices to help you make an informed decision.

1. 120 Volt Led Indicator Light from Amazon.com

If you’re looking for a wide variety of options, Amazon.com is a great place to start. They offer 120 Volt LED indicator lights in various sizes and colors. The price of these lights may vary based on the specific product you choose. Keep in mind that prices can fluctuate depending on the size and color you prefer.

2. 14mm 12V 220V 110 Volt LED Indicator Lights from Indicatorlight.com

Indicatorlight.com is another platform where you can find 110 Volt LED indicator lights. They specialize in 14mm indicator lights that are available in 12V, 220V, and 110V voltage options. However, the website does not specify the exact price for these lights. We recommend reaching out to Indicatorlight.com directly for pricing information.

3. Indicator Light Manufacturers in the USA from OMCH

OMCH is a reputable manufacturer in the USA that offers a wide range of indicator lights, including 110 Volt LED options. With over 300 types of indicator lights available, they are likely to have the perfect fit for your needs. However, specific pricing information is not provided on their website. To get accurate pricing details, we suggest contacting OMCH directly.

4. Alpinetech PL8B 8mm 5/16″ Green 120V AC/DC LED Metal Signal Indicator Pilot Dash Light from Amazon.com

For a specific product recommendation, consider the Alpinetech PL8B 8mm 5/16″ Green 120V AC/DC LED Metal Signal Indicator Pilot Dash Light available on Amazon.com. This particular LED indicator light is green in color and has a 120V AC/DC rating. The price for this product is $5.95 USD.

Summary of Prices

To summarize the price range for 110 Volt LED Indicator Lights in the USA:

  • Amazon.com offers a variety of options with prices varying based on product size and color.
  • Indicatorlight.com provides 14mm LED indicator lights with different voltage options, but the price is not specified.
  • OMCH, a manufacturer in the USA, offers a wide range of indicator lights, including 110 Volt options. However, specific pricing information is not available on their website.
  • For a specific product recommendation, the Alpinetech PL8B 8mm 5/16″ Green 120V AC/DC LED Metal Signal Indicator Pilot Dash Light is priced at $5.95 USD on Amazon.com.

When purchasing 110 Volt LED Indicator Lights, it’s important to consider your specific requirements and budget. Take the time to compare prices and features to find the perfect fit for your needs.

LED Indicator Light Applications

12 volt LED indicator lights are electronic components widely used in various devices and machines, and they can indicate circuit status, warning and display information.

In Western kitchen equipment, the role of this 12V indicator light is to indicate whether the toaster is energized and working. When the toaster is energized and working, the 12V indicator light will light up, and people can understand whether the machine is working by observing the status of the LED indicator light. This indicator light can help users quickly understand the status of the equipment, making it more convenient for operation and maintenance.

12v indicator lights have the characteristics of low power consumption, long life and high brightness, so they have been widely used in modern electronic products. Manufacturers can produce different types of indicator lights according to the needs of customers to adapt to different application scenarios. During the production process, manufacturers need to pay attention to quality control and safety to ensure the stability and reliability of the products.

In addition to 12V indicator lights, there are other types of indicator lights that can be used in different application scenarios. For example, in automobiles and motorcycles, automated equipment, medical equipment, etc.

LED Indicator Lights

In summary,12v LED indicator lights are electronic components widely used in various devices and machines, and they can indicate circuit status, warning and display information.

The installation size of this 12V LED indicator light is 14mm, and the voltage can be customized according to the customer’s needs. In Western kitchen equipment, this 110V indicator light is designed with a scale-like shape on the surface, emitting a very beautiful light, which can help users quickly understand the equipment status.

During the production process, manufacturers need to pay attention to quality control and safety to ensure the stability and reliability of the products.

How to wire a 12V Indicator Light:

If you want to connect a 12V indicator light with wires, you can follow these steps:

  1. Use a multimeter to check if the 12V of the indicator light is correct.
  2. Strip the insulation layer of the wire of the 12V LED indicator light: Use wire strippers to remove the insulation layer of the wire, leaving enough length to connect to the device.
  3. Connect the wire to the indicator light: The 12V LED indicator light with wires should have two wires, one for the positive (+) and one for the negative (-). Connect the stripped section of the wire to the positive (+) wire, and use pliers or crimping tools to clamp the wire onto the indicator light wire.
  4. Connect the wire of the 12V indicator light to the power source: Connect the other end of the wire to a suitable power source, which can be connected to the positive (+) terminal of a 12V battery or the positive (+) terminal of a 12V power supply.
  5. Test the connection: After the wiring of the 12V indicator light with wires is completed, turn on the power source and test whether the indicator light lights up to ensure that the connection is correct.

Q&A for 110 Volt LED Indicator Lights


–  Can its mounting port be changed?

The mounting port of this model is 14MM. Generally speaking, it cannot be changed. Each model has fixed parameters, but we have other models of the same type. The mounting port parameters of other models are different. Of course, we can also customize the indicator light.


–  What equipment is 110 volt led indicator lights used for?

The 110 volt led indicator lights has a novel shape, clear light-emitting parts, energy-saving and power-saving, and a long service life. It is suitable for all kinds of small household appliances, electronic equipment, automation equipment, instruments, communication equipment, automobiles, motorcycles, photography, Toys, refrigerators, freezers, electric welders, generators, medical equipment and other electrical circuits are used for various light indicator signals, warning signals, accident signals and other signals.


–  What is the service life of 110 volt led indicator lights? Is there a high probability of damage?

He service life of the LED is 50,000 hours, and the probability of damage is not great. We have passed the quality inspection before delivery. The product quality can be guaranteed, so you can buy with confidence.


–  This 110 volt led indicator lights wants to be waterproof, is it high in waterproof level? Is there any international certification?

110 volt led indicator lights have a high waterproof level, which can reach IP67. It has also obtained several international certifications, such as UL certification from the United States, VDE certification from Germany, CE certification from the EU, and ISO90001 quality management system certification, etc. . Our indicators are up to international standards.


Product Purchase Link

Product Item FL1P-14QW-1
Panel Mount Diameter 14mm
Contact Way With wire
Install Way screw terminal
Lamp Type LED
Rated voltage AC/DC, 3V、6V、12V、24V、110V、220V、380V
Lamp Color red yellow blue green white
Product Design Flat head
Shell Material PC
Base Material PA66 nylon
Terminal Material brass
Applications Coffee machine, kitchen equipment, household appliances,    automobiles, medical equipment, industrial equipment etc
Component name Material
lens PC plastic
Metal Body H59 brass or 304 stainless steel
Wahser T10 Cold Rolled Steel
Rubber Ring SIL silica gel
Nut H59 nickel plated brass
Housing PA66 nylon
Light Source LED
Resistor Metal film
Cable PTFE AWG22 0.3mm²
Plug-in C2680 RoHS brass
Items Parameter
Rated Voltage 3V-780V DC or AC
Rated Current 20mA
Rated Power 0.2W
Insulation and Voltage Resistance 1800V
Working Life 100000h
Electrical Life 100000
Cold-resistant -40℃
Heat-resisting 80℃

AC 220v LED Indicator Light Metal 14mm 2Pin CE Certified | FILN

Product Drawing

AC indicator light

SUMMARY


The FILN FL1M-14SJ-2 is an industrial-grade AC 220v led indicator light featuring a rugged 14mm metal body with a highly visible convex head design. Engineered for harsh environments, this premium signal lamp offers a robust alternative to fragile plastic components, utilizing either a silver-toned copper alloy or a sleek black zinc-aluminum alloy shell. Equipped with high-brightness LED elements available in Red, Green, Yellow, Blue, and White (RGYBW), it delivers clear status signaling across dual-pin metal terminals. Offering IP65/IP67 ingress protection via an integrated silicone O-ring, it functions seamlessly across a broad voltage range of 3V to 250V (optimized for 5-24V and 110-220V applications). Certified by UL, CE, TUV, and RoHS, this panel-mount indicator is built by factory-direct manufacturer FILN for industrial automation cabinets, experimental setups, and heavy machinery operating worldwide.

KEY TAKEAWAYS


  • Convex Head Design: Features an elevated 14mm convex profile to maximize multi-angle visual recognition on dense electrical panel configurations.
  • Premium Metallic Shells: Available in high-strength silver copper alloy or black-finished zinc-aluminum alloy to eliminate cracking, UV degradation, and thermal deformation common to plastic lights.
  • Broad Operating Voltage: Supports a wide electrical envelope from 3V to 250V, with standardized internal engineering optimized for 5-24V DC and 110-220V AC systems.
  • Simplified 2PIN Installation: Utilizes dual-pin metal tabs for rapid soldering or quick-connect terminal attachment, minimizing installation cycle times during cabinet building.
  • IP67 Environmental Ingress Protection: Achieved through a precision-molded silicone sealing washer and robust internal potting, preventing water and oil intrusion under high-pressure conditions.
  • Multi-Color Spectrum Availability: Engineered with advanced LED dies across five primary industrial signaling colors: Red, Green, Yellow, Blue, and White (RGYBW).
  • Secure Single-Nut Mounting: Threaded structural body relies on a rear hex-nut lock system and premium stainless steel star washer to resist severe vibration decoupling.
  • Global Compliance Profiles: Extensively audited and certified to meet international electrical safety directives including UL, CE, TUV, CB, RoHS, and REACH.
  • Factory-Direct Customization: Manufactured within FILN’s dedicated ISO9001 facility, guaranteeing direct supply chains, rapid prototyping, and zero minimum order quantity restrictions.

WHAT IS AN AC 220V LED INDICATOR LIGHT


An AC 220v led indicator light is a heavy-duty optoelectronic device designed to translate electrical current into visible status signaling within industrial control circuits. Positioned as a fundamental element in machine safety interfaces, it instantly communicates system statuses such as power live, sequence running, faults, or localized hazards to human operators. This device is optimized structurally for clean panel integration, providing structural feedback loops that maintain overall workflow rhythm and site safety protocol execution.

Modern panel indicators are broadly classified into two material families: metal-shelled indicator lights and plastic-shelled indicator lights. While plastic units satisfy light-duty commercial environments, industrial engineering favors metal enclosures for structural resilience. Mounting configurations span precision diameters from 6mm to 30mm, accommodating space-constrained instrumentation or high-visibility large-scale layouts. Wiring interfaces are similarly specialized, offering either rigid 2-pin quick-connect terminals or integrated factory-insulated wire leads to match divergent production-line practices.

To align with complex aesthetic and ergonomics layouts, metal indicators are manufactured across three distinct face designs: flat head, round/convex head, and concave head. The flat head provides a flush, clean layout that minimizes accidental touch activation. The convex head extends prominently beyond the panel plane to provide wide-angle peripheral visibility across large floor spaces. The concave head recesses the optical lens to protect the luminescent surface against mechanical abrasions, falling debris, or high-impact contact common in automated fabrication environments.

The widespread adoption of metal indicator lights stems from their superior structural lifespan under stress. Unlike plastic alternatives which exhibit yellowing, embrittlement, and thermal cracking under persistent exposure to UV rays or elevated ambient heat, metallic bodies sustain structural stability. Combined with integrated vibration resistance and robust sealing options, these resilient components serve as foundational building blocks for modern control station panels, processing plants, power grids, and critical electrical equipment infrastructure worldwide.

FILN Industrial Metal Indicator Light Selection

PRODUCT OVERVIEW


The FILN FL1M-14SJ-2 manifests advanced industrial design, operating as a 14mm convex head metal signal device purpose-built to withstand brutal environments. Internally, the component links a high-performance Solid-State gallium-based LED matrix with a protective carbon film current-limiting resistor network. When an electrical potential up to 220V AC is injected across the dual-pin copper terminal tabs, electron recombination inside the semiconductor junction generates clear, uniform light emission across the multi-angle polycarbonate lens.

Mechanically, the assembly relies on a precision-machined threaded barrel that establishes a stable mechanical connection with the main equipment faceplate. The presence of a dedicated silicone O-ring allows the structure to seal completely against raw moisture, cutting fluids, and fine particulates, achieving certified IP65 and IP67 ingress protection ratings. This ensures long-term electrical insulation and mitigates common short-circuit risks that degrade unsealed control panel frameworks over extended deployment lifecycles.

This 14mm metallic pilot unit is engineered for power distribution systems, medical control consoles, automation assembly networks, and maritime instrument dashboards. Its heavy-duty composition withstands persistent mechanical vibration, mechanical impacts, and chemical cleaner spray downs, outperforming light-duty plastics. Backed by rigorous international regulatory verifications including UL, CE, RoHS, and TUV, the FL1M-14SJ-2 provides procurement officers and design engineers with an authoritative, long-life solution for critical status-monitoring architecture.

QUICK SPECIFICATIONS


Technical Parameter Attribute Specification Values & Field Performance Standards
Product Description 2PIN Pin Type
Model Identifier FL1M-14SJ-2 Series
Mounting Hole Dimension 14.0 mm / 0.551 inches panel cutout diameter
Operational Voltage Options 3V to 250V AC/DC range; standardized for 5-24V and 110-220V configurations
Available LED Illumination Colors Red, Green, Yellow, Blue, White (RGYBW spectrum)
Waterproof / Ingress Protection IP65 / IP67 certified environmental protection level
Wiring Configuration Type 2PIN Metal soldering lugs / Integrated flexible wire lead options
Optical Face / Head Typology Convex head profile (Flat or standard round heads available on request)
Surface Finishing Quality Smooth, burr-free exterior; zero oxidation scaling, zero structural cracks
Mechanical Assembly Standard Flawless head-to-base component integration; zero rotational slip, zero tilt misalignment

PERFORMANCE PARAMETERS


Electrical & Lifespan Metric Certified Engineering Value Limits
Rated Working Voltage Range 3V to 240V DC/AC (Fully customizable based on project engineering scope)
Alternating Current Frequency Range 50 Hz to 60 Hz standard power grid adaptation
Rated Operating Current Draw ≤ 20 mA at continuous electrical excitation
Total Rated Power Dissipation Approximately 0.2 Watts maximum energy footprint
Insulation Electrical Resistance ≥ 100 MΩ (Verified between terminal lead and conductive outer shell via DC 500V test)
Dielectric Insulation Breakdown Strength 1500V to 1800V AC testing phase; zero dielectric breakdown or flashover arcing
Operational Luminous Working Life 50,000 Hours to 100,000 Hours continuous emission profile
Ingress Protection Level Verification IP67 absolute dust-tight and immersion-ready barrier

COMPONENT MATERIALS


Accessory / Component Sub-Part Name Selected Engineering Material Compositions Industrial Design Justification & Application Value
Exterior Main Shell Housing Copper Alloy (Nickel/Chrome plated) / Black Zinc-Aluminum Alloy Provides absolute mechanical impact defense, structural integrity, and long-term anti-oxidation properties.
Internal Lamp Holder Unit Polyamide 66 (PA66 Nylon) Ensures high thermal insulation threshold, flame-retardant capability, and structural rigidity.
Optical Lens Lampshade Polycarbonate (PC) Delivers optimal light transparency, UV resistance, and crack avoidance under thermal fluctuations.
Internal Luminescent Source High-Brightness Solid State LED Die Matrix Generates intense luminous output, low current consumption, and multi-decade operating performance.
Current Protection Resistance Carbon Film Resistance Module Secures electrical current clamping stability, protecting semiconductor dies from voltage spikes.
Conductor Wireway Systems Polyvinyl Chloride (PVC) Insulated Multi-Strand Copper Provides flexible layout configurations and dependable dielectric pathways.
Rear Fastening Mounting Nut Copper Alloy Maintains high thread stripping thresholds during aggressive mechanical installation torquing.
Waterproof O-Ring Seal Silica Gel (Silicone Elastomer) Forms an airtight, compressible boundary sealing against liquids and extreme environmental shifts.
Anti-Vibration Lock Washer Stainless Steel (Plum Blossom / Star pattern) Exerts multi-point tension tracking to prevent thread loosening on heavy industrial machinery.

ENVIRONMENTAL PERFORMANCE Profiles


Application Engineering Scope: This testing regime defines the general operating parameters and limits for the FILN Metal Indicator Light Series, verifying mechanical and structural survival thresholds across hostile deployment zones.

Environmental Testing Standard Matrix Certified Engineering Metric Limits
Component Part Designation Heavy Duty Industrial Metal Indicator Light
Operating & Storage Temperature Envelope -40°C to +80°C continuous thermal window
Operating Relative Humidity Maximums ≤ 85% Non-condensing relative humidity maintained at +40°C
High Temperature Endurance Verification 96 Continuous hours inside chamber fixed at 80±2°C; zero physical deformation
Low Temperature Cryogenic Survival Test 96 Continuous hours inside deep freeze at -40±2°C; zero lens clouding or body brittleness
Constant Humidity & Temperature Stability 96 Hours exposed to 40±2°C with humidity scales at 90% to 95% RH; zero insulation degradation
Thermal Shock Cycling Endurance Test Alternating cycles between -40°C (30min) and 85°C (30min) for 5 complete loops; zero seal separation

LED ELECTRO-OPTICAL SPECIFICATIONS


1. Absolute Maximum Ratings

LED Semiconductor Boundary Threshold Parameter Absolute Maximum Safety Limits
Maximum Forward Peak Current 20 mA maximum continuous flow limit
Absolute Reverse Junction Voltage 5 V threshold limit
Total Power Dissipation Internal Capacity 60 mW limit
Operating Temperature Threshold Range -40°C to +80°C safe range
Storage Temperature Safe Range Envelope -40°C to +100°C protection range
Lead-Free Reflow Soldering Temperature Maximum 260°C exposure limit sustained for up to 3 seconds

2. Electro-Optical Characteristics

Optical / Semiconductor Test Condition Standard Operating Test Conditions (Ambient Temperature Ta = 25°C)
Forward Operating Voltage Tested at a forward current of 20 mA; forward voltage ranges from a minimum of 2.8 V to a maximum of 3.2 V
Leakage Reverse Current Leak Tested at reverse voltage of 5 V; maximum reverse current is limited to 5 μA
Spatial Luminous Angle Tested at a forward current of 20 mA; typical viewing angle is 60°
Luminous Intensity Tested at a forward current of 20 mA; luminous intensity ranges from a minimum of 500 mcd to a maximum of 800 mcd
Recommended Working Current Typical continuous operation baseline is 20 mA
Dominant Color Emission Wavelength Tested at a forward current of 20 mA; standard wavelength range is 520 nm to 525 nm
Internal Semiconductor Junction Temp Capped at a maximum operational running limit of 125°C at 20 mA
Thermal Resistance Interface Coefficient Tested at a forward current of 20 mA; typical thermal resistance rating is 8°C per watt

STANDARD TEST CONDITIONS


Unless explicitly specified within a distinct project specification datasheet, all electrical and electro-optical performance values are recorded under standard international laboratory atmospheric baselines defined below:

Atmospheric Parameter Criteria Standard Calibration Target Ranges
Ambient Ambient Temperature 5°C to 35°C standard range
Relative Atmospheric Humidity Scales 45% to 85% RH bounds
Barometric Air Pressure Matrix 86 kPa to 106 kPa (Equivalent to 860 mbar to 1060 mbar)

Engineering Verification Notes: Luminous intensity mappings and dominant color spectral wavelengths are calibrated using optical goniosphotometers in strict accordance with the CIE international standard human eye spectral response curve. The certified tolerance thresholds for human eye response calibration are restricted to ±15% for luminous intensity assessments and ±0.1V for forward operational voltage tracking.

APPLICATIONS BY INDUSTRY


Featuring high-strength plated copper alloy or premium stainless steel housings, metal indicator lights deliver high impact strength and IP67 dust and moisture exclusion barriers. These rugged components are preferred for high-stress manufacturing sectors and commercial equipment installations. Compared to plastic pilot lights that fail early due to ultraviolet embrittlement, stress cracking, and high-temperature deformation, metallic assemblies survive high-frequency actuation cycles in extreme industrial settings.

1. Industrial Automation & CNC Machining Centers

Factory floors expose operator components to mechanical vibrations, airborne coolant mists, lubricating oils, and flying shard debris. Metal indicator lights integrate tightly into CNC machine control facias and main automated line PLC cabinets to represent active status parameters safely. In these configurations, green indicates standard operation, yellow warns of tool adjustments or idle cycles, and red triggers emergency stops or fault conditions. The solid metallic enclosure prevents structural degradation from cutting fluids and abrasive metal shavings.

Furthermore, large power distribution networks and PLC control panels use compact 6mm or 8mm metal status lamps to handle 24VDC control circuits or 220VAC power paths. In high-vibration applications like hydraulic pumps or compressed-gas infrastructure, pre-wired integrated metal indicator configurations provide dependable durability over pin-terminal connections, preventing physical separation or failure due to harmonic resonance.

2. Outdoor Infrastructure, Renewable Energy, & EV Charging Stations

Outdoor electrical infrastructure faces extreme weather changes, solar radiation, and sub-zero winter temperatures. Public electric vehicle charging kiosks use flat-head or convex metal LED indicators to signify localized charging statuses. Blue or green pulses represent an active power transfer sequence, steady illumination signifies full cell saturation, and red warns of ground fault leakage or insulation breakdown. The robust IP67 seal and impact-resistant housing protect against vandalism and heavy rain.

Similarly, remote utility photovoltaic combiner boxes and outdoor municipal grid switches use these resilient metallic lamps to track high-voltage grid connections and inverter lifecycles. Operating reliably within an extended thermal window of -40°C to +80°C, these components ensure continuous uptime during severe seasonal temperature swings.

3. Heavy Duty Transit, Rail Systems, & Marine Applications

Heavy transit and maritime operations require resistance to intense mechanical shock, dust ingress, and corrosive atmospheres. Heavy excavator, crane, and bulldozer dashboards rely on these metal indicators to track vital engine metrics, oil pressures, system temperatures, and brake system engagement. The robust metal housings withstand dusty job sites and mechanical shock waves.

For maritime bridges and engine room panels, chrome-plated or stainless steel housings prevent salt spray corrosion and pitting. Paired with tight silicone panel gaskets, they stop seawater intrusion to protect sensitive electrical circuits.

4. Public Interactive Kiosks & Explosion-Risk Safety Fields

Unsupervised public ticketing terminals, automated vending machines, and urban security intercoms require rugged, impact-resistant user interfaces. Metal indicators provide robust resistance to physical damage while signaling transaction stages like payment processing, product dispensing, or change return. At hazardous fuel dispensing points, the solid metal enclosure provides reliable electrical isolation to enhance explosion-proof safety.

5. Medical Instruments & Sanitary Food Processing Machinery

Food packaging and medical washdown facilities utilize aggressive high-pressure hot water and chemical sanitizers to maintain hygiene standards. IP67-rated metal indicators withstand chemical spray downs and moisture ingress without degradation. In medical sterilization enclosures, these indicators clearly display operational stages like heating, sterilization, and exhaust venting.

Selection Summary

Standard plastic indicators face accelerated aging, UV yellowing, and cracking from factory oils and outdoor weathering, while vibration can cause loose connections. FILN’s metal indicator lights—built with premium copper or zinc housings, silicone seals, and integrated connections—eliminate these failure points to ensure dependable, long-term equipment operation.

FILN Industrial Indicator Lights Application Environments

INDUSTRIAL COLOR CODING DISCIPLINE (R/G/Y/B/W)


In modern industrial operations, color-coded signaling functions as a critical safety and operational language. To prevent communication errors among operators, the five core LED colors (RGYBW) follow standardized global electrical conventions, including IEC 60204-1 and NFPA 79 frameworks.

  • Red (Emergency / Danger / Fault Status): Signifies critical system anomalies, circuit trips, over-temperature conditions, or emergency shutdowns. Red demands immediate operator intervention to prevent equipment damage or personal injury.
  • Green (Safe State / Normal Operation): Confirms active safety loops, normal operational parameters, or energized circuits running within nominal tolerances. Green indicates the area or process is safe to monitor standard production.
  • Yellow / Amber (Abnormal Condition / Warning / Attention): Identifies marginal operating limits, thermal pre-warnings, or automated processes transitioning between stages. Yellow signals operators to prepare for adjustments before a fault develops.
  • Blue (Mandatory Action Required Status): Indicates specific operator steps must be completed before a process can proceed, such as loading materials, executing reset protocols, or running fluid replacement cycles.
  • White (Neutral Status / Power Present Presence): Provides basic utility feedback, such as verifying the mains line voltage is active, an isolated sub-circuit is energized, or indicating standard system standby.

In specialized control systems, colors can take on distinct situational meanings based on custom facility protocols. For example, in specific power generation plants, Red may indicate a closed circuit breaker (live power line flow), while Green confirms an open circuit breaker (isolated safe line), which is the opposite of standard machinery color meanings. Additionally, flashing states can be used alongside steady illumination to emphasize urgency, with a rapid flash denoting higher critical priority than a solid light.

To address advanced system requirements, FILN engineers high-performance bi-color and tri-color integrated metal indicators. These multi-wavelength options pack independent LED dies into a single 14mm housing, allowing one indicator to display multiple system states (e.g., Red/Green or Red/Yellow/Green), saving panel space and simplifying complex visual interfaces.

PANEL STEP-BY-STEP INSTALLATION GUIDE


Proper installation of the 14mm convex head metal indicator light ensures structural integrity, reliable electrical contact, and long-term IP67 ingress protection. Follow this standardized mechanical assembly sequence:

  1. Panel Layout and Cutout: Mark the center point on your panel facade and drill a clean 14.0 mm circular mounting hole using a stepped drill bit or chassis punch. Remove any sharp metal burrs from both sides of the cutout to ensure a flat, secure seating surface.
  2. Gasket Alignment: Slide the provided flexible silicone waterproof washer over the threaded metal body of the indicator, seating it flush against the underside of the convex head.
  3. Chassis Insertion: Insert the indicator assembly into the 14mm cutout from the front face of the panel, pushing it inward until the silicone gasket presses flat against the exterior sheet metal.
  4. Rear Securing: From behind the panel, slide the stainless steel star lock washer over the 2PIN terminal base onto the threaded shaft, followed by the copper alloy locking hex nut.
  5. Final Torque Adjustment: Hand-tighten the hex nut clockwise, then secure it using an open-ended wrench. Tighten until the front silicone gasket compresses slightly to form a watertight seal, avoiding over-torquing which could strip the threads.
  6. Electrical Termination: Connect your 220V AC circuit wires to the 2pin metal terminals using proper soldering techniques or insulated quick-connect female lugs, completing the installation.

CRITICAL SAFETY WARNING: Always disconnect and lock out the main power source before starting installation or wiring. Verify the circuit is completely de-energized with a calibrated voltage meter to prevent electrical shock or serious injury.

FILN 14mm Metal Indicator Light Installation Sequence

ELECTRICAL TERMINATION & WIRING INFRASTRUCTURE


Electrical terminations for the FILN 14mm metal indicator light line must match the specific model variation selected: pin-lug connections or factory-integrated wire leads. Pin-lug variations feature two rigid, silver-plated copper alloy tabs protruding from the rear polyamide base. These pins are designed for direct low-resistance soldering or matching female quick-connect terminal lugs, which simplify field replacements in dense automation racks.

For factory-insulated pre-wired variations, the integrated conductors can be spliced into control loops using several approved methods. Quick-connect lever nuts or screw terminal blocks provide reliable, reusable termination points. For high-vibration applications, conductors should be spliced using rosin-core solder and sealed with adhesive-lined polyolefin heat-shrink tubing or premium electrical wrap to maintain dielectric insulation and prevent moisture intrusion.

VIEW FULL MASTER CATALOG OF FILN METAL INDICATOR LIGHT ARCHITECTURES

Explore our comprehensive range of premium metal panel indicators from 6mm to 30mm with worldwide engineering support.


Open Metal Indicator Light Product Page →

INDUSTRY KNOWLEDGE CENTER


How Solid-State Signaling Operates: Unlike traditional incandescent lamps that rely on fragile tungsten filaments heated to high temperatures, modern metal LED indicators use solid-state electroluminescence. When a voltage is applied across the semiconductor junction, electrons recombine with electron holes to release energy as photons. This direct energy conversion produces minimal heat and eliminates filament degradation, allowing the component to withstand persistent mechanical vibrations and shock profiles.

Why Metal Housing Matters: Industrial facilities present challenging conditions, including airborne oils, chemical fumes, and accidental mechanical impacts. Standard polycarbonate or ABS plastic housings can suffer from accelerated material fatigue, environmental stress cracking, and UV degradation when exposed to sunlight or chemical washes. Machined copper or zinc-aluminum alloy shells provide high structural integrity, protecting internal optical components and maintaining a reliable ground barrier against potential high-voltage short circuits.

Common Installation Mistakes: A frequent installation error is over-torquing the rear hex lock nut during assembly. Applying excessive torque can strip the fine threads on the metal barrel or distort the silicone gasket, which compromises the moisture seal and can lead to water intrusion. Another common issue is using improper soldering temperatures on 2pin terminals; exceeding recommended thermal limits can soften the internal polyamide holder and cause terminal misalignment or component failure.

Preventative Maintenance Guide: Solid-state indicators require no internal service parts, but routine external checks enhance system reliability. Periodically inspect front facias during plant maintenance to ensure the silicone sealing rings remain flexible and free from cracking. Check rear wire terminations to ensure connections remain tight and free from corrosion, and wipe down optical lenses to remove dust or oil buildup that could lower visibility.

B2B BUYER DECISION GUIDE


Selecting the correct indicator configuration requires matching mechanical, electrical, and environmental specifications to your application. Use this engineering checklist to optimize your component selection:

  • Voltage Level Calibration: Match your supply voltage to the internal resistor rating. While the 220V AC configuration is standard for main power distribution panels, 5-24V DC configurations are preferred for low-voltage PLC logic control circuits.
  • Chassis Space Constraints: Measure your panel thickness and available rear depth. The 14mm cutout diameter provides a balanced solution, offering excellent front visibility while keeping a compact rear footprint.
  • Material Finish Selection: Select chrome-plated copper alloy for excellent wear resistance and bright appearance in standard machinery, or choose black zinc-aluminum alloy to eliminate glare and match dark control panel aesthetics.
  • Termination Strategy: Use 2pin quick-connect solder lugs for rapid assembly line production, or select pre-wired factory leads for tight spaces or high-moisture areas requiring sealed junctions.

Verifying international safety certifications is essential for global equipment compliance. Ensure your components carry valid UL markers for North American markets, CE declarations for European installations, and RoHS compliance to satisfy environmental material restrictions. Specifying pre-certified components simplifies final machine testing and accelerates regulatory approval cycles.

WHY ENGINEERS CHOOSE FILN


FILN serves global industrial automation markets by operating as a direct component manufacturer rather than a standard broker entity. This direct control eliminates supply chain markups, coordinates engineering teams directly with factory lines, and allows flexible customization to resolve complex project requirements.

FILN Factory Advantage Operational Scope & Support Standards
Direct Factory Source Eliminates intermediary distribution layers, providing transparent pricing and direct engineering access.
Zero MOQ Policies Supports prototypes, specialized equipment builds, and short-run production without minimum order thresholds.
Rapid Manufacturing Lead Times Optimized production workflows ensure fast delivery to minimize project downtime.
Full OEM & ODM Support Complete design, tooling, and manufacturing capabilities to create custom indicators tailored to your needs.
Global Logistics Network Reliable shipping infrastructure serving industrial markets across North America, Europe, and Asia-Pacific.
Strict Quality Control In-house testing labs verify optical consistency and dielectric strength for every batch.
FILN Industrial Precision Manufacturing Infrastructure

FACTORY DIRECT SUPPLY CAPABILITIES


Yueqing Yulin Electronic Co., Ltd., under the premium brand name FILN, located in Wenzhou, Zhejiang, was established in 2006 as a professional electrical switch manufacturer integrating R&D, production, and sales. Its high-performance FILN brand products are sold in over 100 countries. FILN operates a modern 10,000 m² facility with 20+ advanced production lines and an independent testing lab. Driven by structured manufacturing processes and a verified ISO9001 quality system, FILN ensures continuous innovation and reliable electrical performance. Our certified products (UL, CE, RoHS, REACH, TUV, CB) are widely specified in kitchen appliances, energy storage systems, EV charging, automotive, marine, and security networks.

Our core manufacturing focus specializes in the production of compact electrical switches and signal indicators, including metal pilot lights, toggle switches, rocker switches, pushbuttons, and custom micro-switch assemblies. FILN maintains a certified quality management system, with product lines carrying verified regulatory marks including ISO9001, CE, VDE, RoHS, SGS, UL, IP65, and TUV. This comprehensive quality oversight ensures stable electrical characteristics and reliable mechanical life for every delivered component.

By working directly with our dedicated engineering teams, clients can overcome custom solution design challenges and adapt terminal wiring, body sizes, or resistor tolerances to fit specialized project parameters. For procurement inquiries or technical evaluation samples, reach our engineering office via our main web portal at www.filn.com or via direct email correspondence at inquiry@cnylin.com.cn.

FILN Electronic Components Automated Manufacturing Workshop Floor

TECHNICAL FREQUENTLY ASKED QUESTIONS


Q1: What is the exact mounting hole size required for the FL1M-14SJ-2 indicator light?

A1: This indicator light requires a precision 14.0 mm (0.551 inch) circular cutout hole in the panel chassis for proper installation.

Q2: Can this AC 220v led indicator light handle DC voltages safely?

A2: Yes, the FL1M-14SJ-2 can operate on both AC and DC current paths, with customized internal resistors optimized for specific voltage ranges like 5-24V or 110-220V.

Q3: What are the primary advantages of selecting a metal indicator over a plastic alternative?

A3: Metal indicators provide superior mechanical impact resistance and won’t crack or discolor under high thermal loads or UV exposure, making them ideal for heavy industrial use.

Q4: What finishes are available for the 14mm convex metal indicator light housing?

A4: FILN provides this indicator with a standard bright, silver chrome-plated copper alloy housing or a matte black zinc-aluminum alloy shell.

Q5: What is the ingress protection rating of the FILN FL1M-14SJ-2 light?

A5: The assembly is certified to IP65 and IP67 protection standards when installed with the included silicone sealing washer against a flat panel surface.

Q6: How do the 2pin metal terminals simplify system integration?

A6: The dual-pin design provides rigid termination points that easily accept direct wire soldering or standard quick-connect female crimp lugs, reducing assembly times.

Q7: What options are available if my application requires integrated wire leads instead of pin terminals?

A7: FILN offers direct custom production options, including factory-insulated, pre-wired leads cut to length to meet specific project guidelines.

Q8: Which LED illumination colors can be ordered for the 14mm metal indicator?

A8: The product line is available in five standard industrial signaling colors: Red, Green, Yellow, Blue, and White (RGYBW).

Q9: What is the typical operational lifespan of the internal LED light source?

A9: The high-brightness solid-state LED elements provide a rated operating life of 50,000 to 100,000 hours under nominal conditions.

Q10: What international electrical safety certifications does this product hold?

A10: The FILN indicator series is fully certified and compliant with UL, CE, TUV, CB, RoHS, and REACH safety standards.

Q11: Can the indicator light withstand high-vibration applications like heavy machinery?

A11: Yes, the unit includes a stainless steel star lock washer that maintains constant rear tension to prevent loosening in high-vibration environments.

Q12: What is the maximum power consumption of the 220V AC indicator light?

A12: The indicator operates efficiently with a low power dissipation rating of approximately 0.2 Watts at full brightness.

Q13: Does FILN offer customized engineering solutions for specific terminal requirements?

A13: Yes, as a direct factory manufacturer, FILN provides complete OEM and ODM support to customize dimensions, terminations, and resistance values.

Q14: What are the safe operating temperature limits for this component?

A14: The indicator is rated for reliable continuous operation within an extended temperature window of -40°C to +80°C.

Q15: How does the convex head profile improve panel safety compared to flat designs?

A15: The elevated convex lens profile extends beyond the panel face, providing wider viewing angles so operators can see status updates from across the factory floor.

Q16: Does FILN enforce a minimum order quantity (MOQ) for custom voltages?

A16: No, FILN maintains a zero MOQ policy, supporting engineering prototypes, short-run equipment builds, and high-volume orders equally.

Q17: What material is used to construct the internal lamp holder matrix?

A17: The internal core is molded from premium Polyamide 66 (PA66 Nylon), which provides excellent flame-retardant properties and electrical insulation.

Q18: What is the dielectric insulation strength of the FL1M-14SJ-2 series?

A18: The component withstands test potentials from 1500V to 1800V AC between electrical pathways and the outer housing without flashover breakdown.

Q19: Can this indicator light be specified for outdoor marine dashboard applications?

A19: Yes, the chrome-plated copper shell and silicone sealing gaskets resist salt-spray corrosion and water intrusion, making it suitable for marine environments.

Q20: How can technical buyers contact FILN for direct volume procurement quotes?

A20: Technical procurement teams can visit our official website at www.filn.com or email our sales office directly at inquiry@cnylin.com.cn.