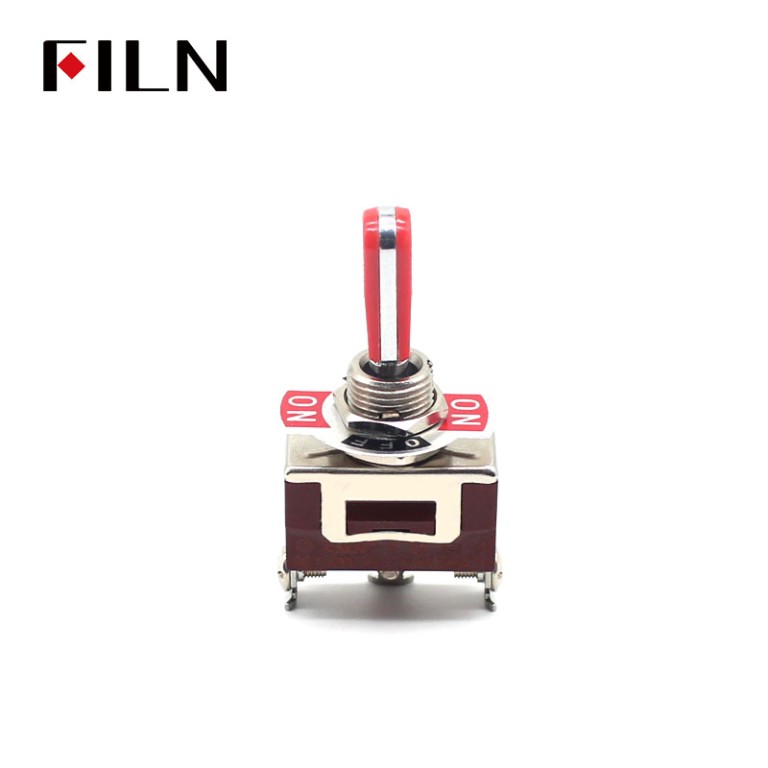
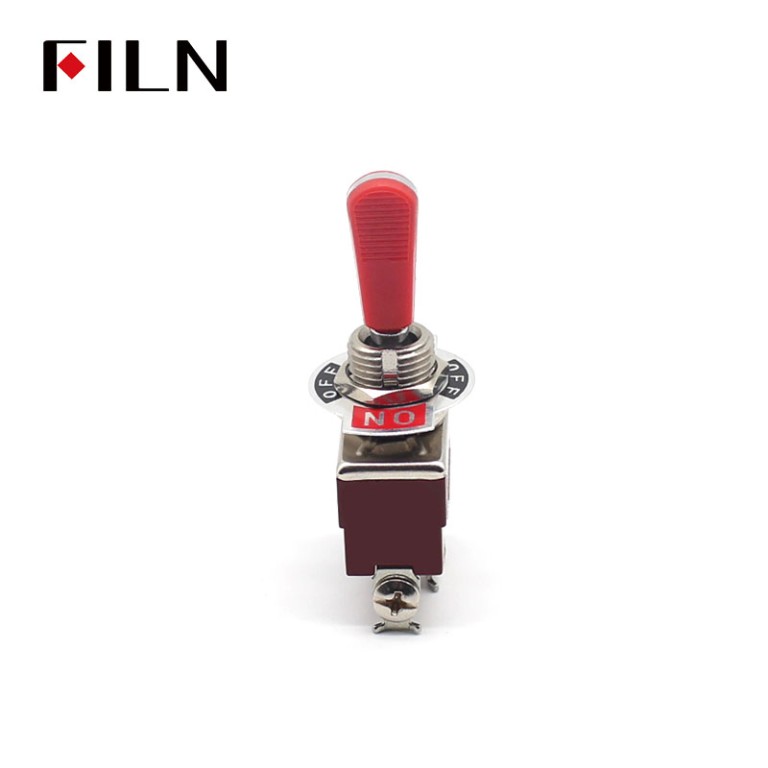
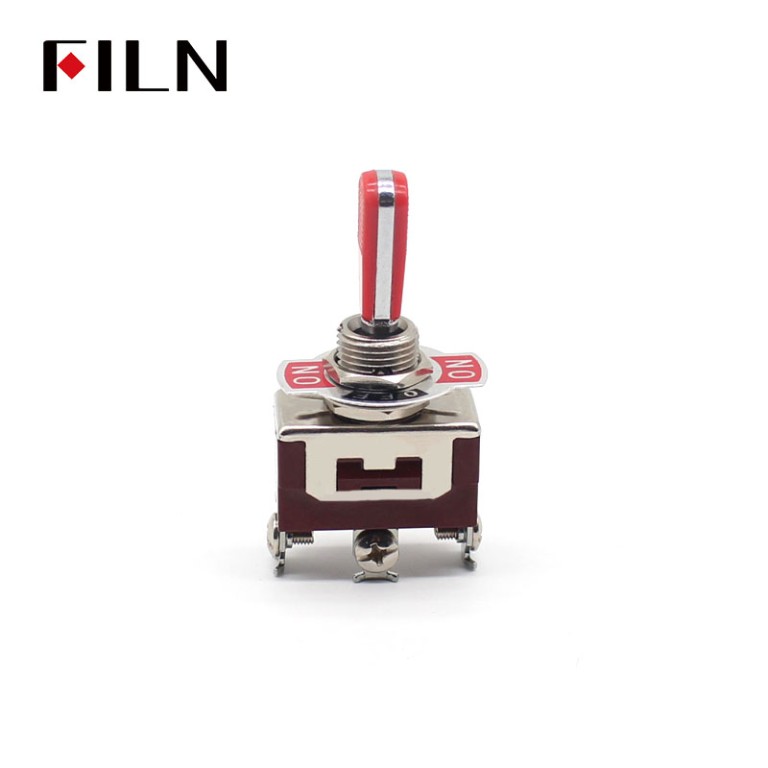
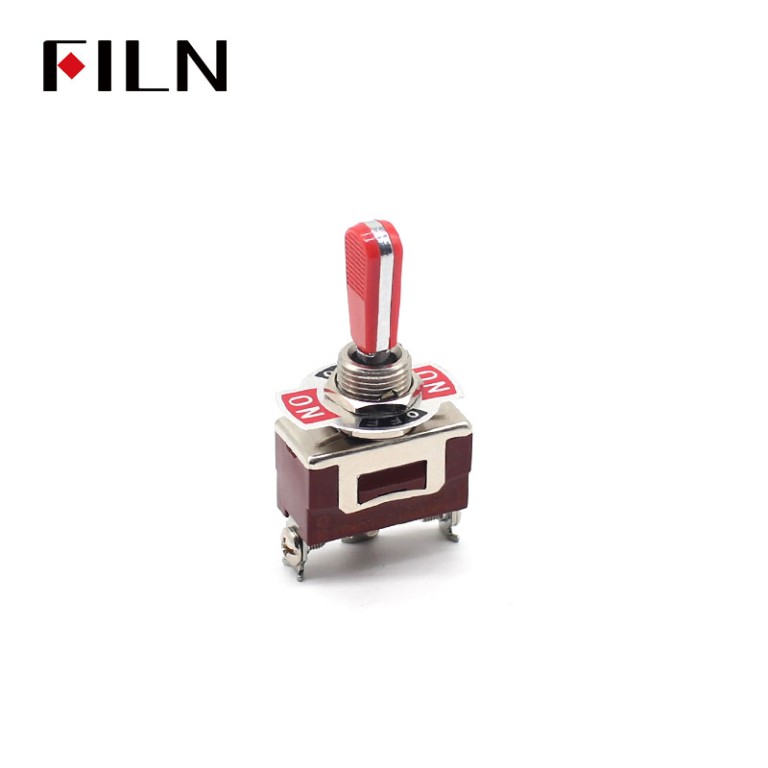
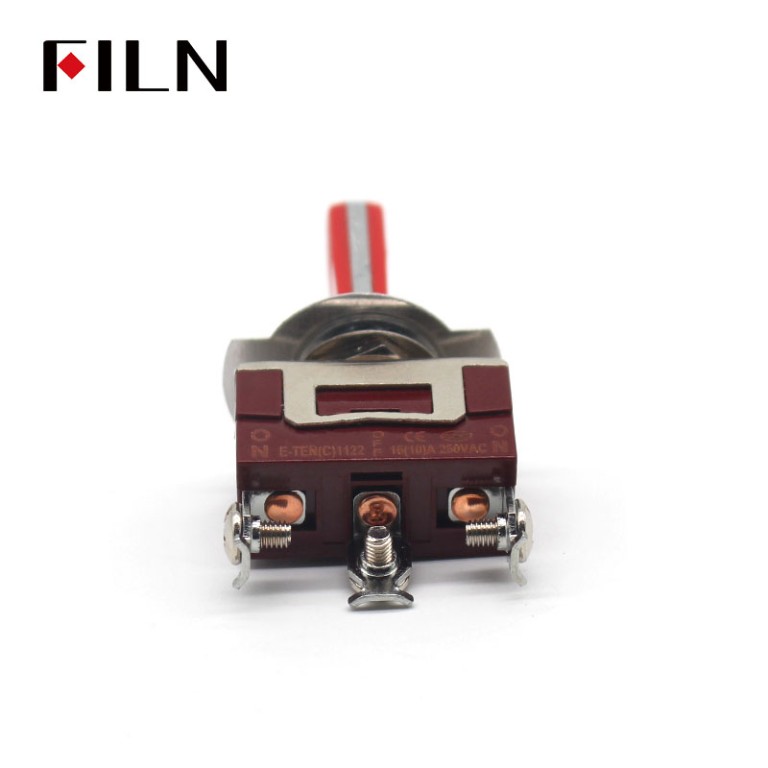
Guide to 3 Prong Toggle Switch: Wiring, Types, and Applications
Guide to 3 Prong Toggle Switch: Wiring, Types, and Applications
- Model:2 prong 12v Toggle Switch
- Name:3 prong toggle switch
- Working Voltage: < 250V
- Electric Current:20A
- Contact:Open/Closed
- Voltage:250V
- Life:50000 times
- Specifications: 2 pin 2 positions
- Email:inquiry@cnylin.com.cn
- Website:www.FILN.com
Navigating the world of 3 prong toggle switches can be both fascinating and complex, with a wide array of applications and wiring techniques to explore. This comprehensive guide delves into the intricacies of the 3 prong toggle switch, along with related topics such as 3 pin toggle switch, 3 prong 12V switch wiring diagram, 2 prong toggle switch, and how to wire a lighted switch 12V. Whether you’re a hobbyist looking to enhance your latest project or a professional in need of detailed insights, this article offers step-by-step instructions, safety guidelines, troubleshooting tips, and more to ensure successful and innovative use of these versatile switches. Let’s embark on this enlightening journey that opens up new horizons in the realm of electrical controls and aesthetics.
Table of Contents
Step 1: Most Asked Questions About 3 Prong Toggle Switch
- What is a 3 prong toggle switch and how does it differ from 2 prong toggle switches?
- How do you wire a 3 prong toggle switch, including a 3 prong 12v switch wiring diagram?
- What are the applications of a 3 prong switch with relay and 3 pin illuminated rocker switch?
- How do you wire a 2 pin rocker switch wiring diagram compared to a 3 prong switch wiring diagram?
- Can you explain how to wire a lighted switch 12v, specifically focusing on the 3 pin toggle switch?
- What are the safety considerations for using a 3 prong or 3 pin toggle switch?
- How do you choose the right type of 3 prong or 2 prong toggle switch for various applications?
- What are the most reliable brands for 3 prong toggle switches?
- How do you troubleshoot common problems with a 3 prong toggle switch?
- Where can you purchase a 3 prong toggle switch and what are the cost considerations?
Step 2: Understanding 3 Prong Toggle Switch vs 2 Prong Toggle Switch
Definition of 3 Prong Toggle Switch
A 3 prong toggle switch is a type of electrical switch that uses three terminals, including a common terminal and two other terminals that connect to the desired circuits. This type of switch can be used to control various electrical appliances.
Difference Between 3 and 2 Prong Toggle Switch
The primary difference between a 3 prong toggle switch and a 2 prong toggle switch is the number of terminals. A 3 prong switch has one more terminal, providing additional functionality. The 3 prong switch allows for more complex wiring configurations, while a 2 prong switch has a simpler design.
Advantages of 3 Prong Toggle Switch
The main advantages of using a 3 prong toggle switch include more control over electrical circuits, enhanced safety features, and compatibility with multiple devices. It is often preferred in applications requiring a middle position, such as motor control.
Limitations of 3 Prong Toggle Switch
Despite its advantages, a 3 prong toggle switch may have some limitations, such as complexity in wiring and the need for more space compared to a 2 prong toggle switch. The additional prong might also lead to potential confusion during installation.
Common Applications of 3 Prong Toggle Switch
The 3 prong toggle switch is widely used in various applications, including automotive systems, industrial machinery, home appliances, and more. It provides precise control and versatility in connecting different circuits.
Selecting the Right Type of Toggle Switch
When selecting between a 3 prong or 2 prong toggle switch, it’s essential to consider the application’s requirements. For simple on/off functionality, a 2 prong switch may suffice. For more complex control, a 3 prong switch is preferred. You can find various types of toggle switches at Indicator Light.
Safety Considerations with 3 Prong Toggle Switch
Proper installation and understanding of the 3 prong toggle switch are crucial to ensure safety. It is advisable to follow the manufacturer’s guidelines and consult with an electrician if necessary.
3 Prong Toggle Switch in the Market
Several brands offer high-quality 3 prong toggle switches. It’s vital to research and choose a reputable brand that provides durability, reliability, and appropriate specifications for your specific needs.
Final Thoughts on 3 Prong Toggle Switch
The 3 prong toggle switch offers enhanced functionality compared to its 2 prong counterpart. While it may require more expertise in installation, its applications and benefits in various industries make it a valuable component.
Step 3: Wiring a 3 Prong Toggle Switch Including a 3 Prong 12V Switch Wiring Diagram
Basics of Wiring a 3 Prong Toggle Switch
Wiring a 3 prong toggle switch involves connecting the common terminal to the power source and the other two terminals to the desired circuits. This configuration allows for more complex control, such as switching between two different circuits.
Tools and Materials Required
To wire a 3 prong toggle switch, you’ll need essential tools like a wire stripper, screwdriver, pliers, and appropriate wires. Ensure that the wires’ gauge matches the specifications of the toggle switch to avoid potential issues.
3 Prong 12V Switch Wiring Diagram
Here’s a general wiring diagram for a 3 prong 12V toggle switch:
- Common Terminal (C): Connect to the 12V power source.
- Terminal A: Connect to the device you want to control (e.g., a motor or light).
- Terminal B: Connect to the ground or another device if desired.
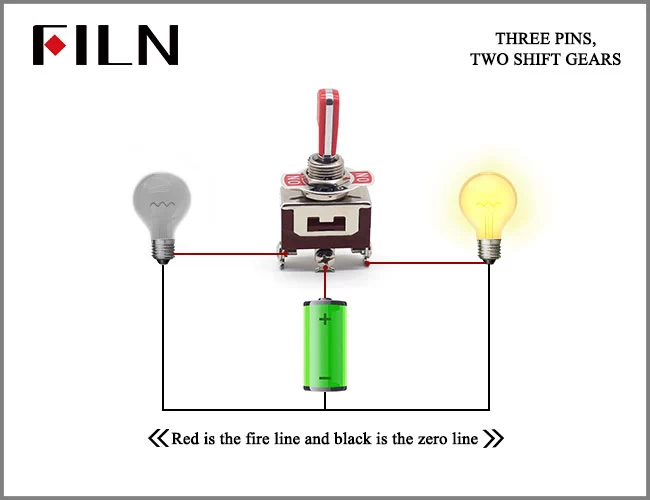
It’s important to follow the manufacturer’s instructions, as the terminal labels may vary.
Adding a Relay to the Circuit
When wiring a 3 prong switch with a relay, the relay can be used to control higher current loads. Connect the common terminal to the relay’s coil, and wire the other terminals as needed for your application.
Wiring a 3 Pin Illuminated Rocker Switch
A 3 pin illuminated rocker switch wiring diagram might slightly differ, as one terminal can be connected to a light source. The illumination adds a visual indicator of the switch’s position. Consult the specific diagram provided by the manufacturer.
Considerations When Wiring a 3 Prong Toggle Switch
Proper consideration of wire gauge, terminal connections, and adherence to safety standards is vital when wiring a 3 prong toggle switch. It’s recommended to consult an expert if you’re unsure about any part of the process.
Troubleshooting Common Wiring Issues
If the 3 prong toggle switch doesn’t operate as expected, check for loose connections, incorrect wiring, or faulty components. Understanding the wiring diagram and following proper procedures will minimize potential issues.
Importance of Proper Installation
Proper installation of the 3 prong toggle switch ensures optimal performance and safety. Following the correct wiring procedures and using quality materials will lead to a successful installation.
Where to Find More Information
For detailed information on specific 3 prong toggle switch models and wiring guides, visit Indicator Light. They offer various toggle switches and comprehensive resources to help with your project.
Step 4: Applications of a 3 Prong Switch with Relay and 3 Pin Illuminated Rocker Switch
Using a 3 Prong Switch with Relay
A 3 prong switch with relay offers advanced control for high-current applications. By adding a relay, the toggle switch can control devices that require more current without overloading the switch itself.
Common Applications of a 3 Prong Switch with Relay
The 3 prong switch with relay is commonly used in automotive systems, industrial machinery, and heavy electrical equipment. The relay acts as a
buffer, protecting the switch from potential overloads.
Benefits of Using a Relay with a 3 Prong Toggle Switch
The key benefits of using a relay with a 3 prong toggle switch include enhanced safety, increased current handling capability, and the ability to control multiple devices simultaneously.
3 Pin Illuminated Rocker Switch Applications
A 3 pin illuminated rocker switch provides visual feedback on the switch’s status, making it popular in applications where immediate recognition of the switch’s position is essential, such as in automotive dashboards or control panels.
Wiring a 3 Pin Illuminated Rocker Switch
Wiring a 3 pin illuminated rocker switch involves connecting the illumination terminal to the power source, along with the standard connections for a 3 prong toggle switch. This wiring enables the light in the switch to indicate its position.
Advantages of a 3 Pin Illuminated Rocker Switch
The illuminated rocker switch offers advantages like easy identification, aesthetic appeal, and added functionality in low-light conditions. These features enhance user experience and control.
Considerations When Choosing a 3 Pin Illuminated Rocker Switch
When selecting a 3 pin illuminated rocker switch, consider factors such as voltage rating, current capacity, light color, and compatibility with your specific application.
3 Pin Illuminated Rocker Switch in Various Industries
The 3 pin illuminated rocker switch is utilized in various industries, including automotive, marine, home appliances, and more. Its visual feedback and attractive design contribute to its widespread use.
Troubleshooting a 3 Prong Switch with Relay or Illuminated Rocker Switch
Troubleshooting these switches involves checking the wiring, relay operation, illumination functionality, and connections. Refer to the manufacturer’s guidelines and consult a professional if needed.
Step 5: Wiring a 2 Pin Rocker Switch vs 3 Prong Switch Wiring Diagram
Understanding 2 Pin Rocker Switch Wiring
A 2 pin rocker switch wiring is simpler compared to a 3 prong switch, as it consists of only two terminals. This type of switch is typically used for basic on/off functions in various applications.
2 Pin Rocker Switch Wiring Diagram
Here’s a general 2 pin rocker switch wiring diagram:
- Terminal A: Connect to the power source.
- Terminal B: Connect to the device you want to control.
Differences Between 2 Pin and 3 Prong Switch Wiring
The main difference between 2 pin rocker switch wiring and 3 prong switch wiring lies in the number of terminals and the corresponding functionality. A 2 pin switch offers basic control, while a 3 prong switch provides more complex wiring options.
Common Applications of 2 Pin Rocker Switch
2 pin rocker switches are often used in simple electrical applications such as lamps, small appliances, and basic electronic devices. They provide an easy way to turn a device on or off.
Advantages of 2 Pin Rocker Switch
A 2 pin rocker switch offers advantages such as simplicity, ease of installation, and cost-effectiveness. It’s a suitable choice for applications that do not require multi-way control.
Limitations of 2 Pin Rocker Switch
The limitations of a 2 pin rocker switch include reduced functionality and lack of compatibility with more complex circuits. It may not be suitable for applications requiring multiple control options or intermediate positions.
Choosing Between 2 Pin Rocker Switch and 3 Prong Toggle Switch
The choice between a 2 pin rocker switch and a 3 prong toggle switch depends on the specific requirements of the application. For basic control, a 2 pin switch is sufficient, while a 3 prong switch offers more options and complexity.
Safety Considerations for Both Types of Switches
Safety considerations for both 2 pin and 3 prong switches include proper wiring, adherence to voltage and current ratings, and following manufacturer’s instructions. Proper installation ensures safe and efficient operation.
Where to Find 2 Pin and 3 Prong Switches
Both types of switches can be found at various suppliers, including online platforms like Indicator Light. Consider the specific needs of your application when selecting the appropriate switch.
Step 6: How to Wire a Lighted Switch 12V, Focusing on the 3 Pin Toggle Switch
Introduction to Lighted Switch 12V
A lighted switch 12V, particularly focusing on the 3 pin toggle switch, includes a built-in light to indicate the switch’s status. This feature adds convenience and visual appeal to various applications.
Wiring Diagram for a Lighted Switch 12V
Wiring a lighted switch 12V involves connecting the power, load, and ground to the respective terminals. The specific configuration may vary based on the manufacturer’s design:
- Power Terminal: Connect to the 12V power source.
- Load Terminal: Connect to the device being controlled.
- Ground Terminal: Connect to the ground to complete the circuit.
Applications of Lighted Switch 12V
A lighted switch 12V is commonly used in automotive dashboards, control panels, home appliances, and more. The built-in light provides immediate feedback on the switch’s position.
Benefits of Using a Lighted Switch 12V
The benefits of using a lighted switch 12V include easy identification, enhanced user experience, and attractive design. The illumination adds a functional and aesthetic touch to the switch.
Considerations When Selecting a Lighted Switch 12V
When choosing a lighted switch 12V, consider factors like voltage rating, current capacity, light color, and design to ensure compatibility with your application.
Safety Precautions with Lighted Switch 12V
Safety precautions when wiring a lighted switch 12V include following the wiring diagram provided, adhering to voltage and current ratings, and using appropriate tools and materials.
Troubleshooting a Lighted Switch 12V
Common troubleshooting steps for a lighted switch 12V include checking the wiring connections, verifying the illumination source, and inspecting for any damaged components.
Lighted Switch 12V in Various Markets
The lighted switch 12V, especially the 3 pin toggle switch variant, is widely used in different markets and industries. Its functional and visual features make it a preferred choice for many applications.
Where to Purchase a Lighted Switch 12V
You can purchase a lighted switch 12V, including 3 pin toggle switches, from various suppliers like Indicator Light. They offer different models to suit your specific needs.
Step 7: Safety Considerations for Using a 3 Prong or 3 Pin Toggle Switch
Importance of Safety with Toggle Switches
Safety is paramount when using any electrical component, including 3 prong or 3 pin toggle switches. Following proper guidelines ensures protection for both the user and the connected devices.
General Safety Guidelines
General safety guidelines for using toggle switches include following manufacturer’s instructions, using the correct
wiring methods, and adhering to the voltage and current ratings of the switch.
Understanding the Ratings of the Switch
Understanding the ratings of a 3 prong or 3 pin toggle switch involves knowing the maximum voltage and current it can handle. Exceeding these limits can lead to failure or hazards.
Proper Wiring of Toggle Switches
Proper wiring of 3 prong or 3 pin toggle switches involves connecting the terminals correctly according to the wiring diagram and using appropriate wire gauges and connectors.
Use of Protective Devices
Use of protective devices like fuses, circuit breakers, or relays with toggle switches enhances safety by providing protection against overloads and short circuits.
Regular Inspection and Maintenance
Regular inspection and maintenance of 3 prong or 3 pin toggle switches ensure their proper functioning and safety. Periodic checks can identify and rectify potential issues early.
Safety Considerations in Different Environments
Different environments may have specific safety considerations for toggle switches. For example, in wet or humid conditions, using switches with proper sealing or enclosures is vital.
Special Considerations for Illuminated and Lighted Toggle Switches
Special considerations for illuminated and lighted toggle switches include ensuring proper connections to the illumination source and using components rated for the intended application.
Potential Risks and Hazards with Toggle Switches
Potential risks and hazards with toggle switches include electrical shock, overheating, or equipment damage if not properly installed, used, or maintained.
How to Avoid Common Mistakes with Toggle Switches
Avoiding common mistakes with toggle switches involves following proper wiring practices, understanding the switch’s specifications, and seeking professional guidance if needed.
Where to Find Safety Information and Guidelines
Safety information and guidelines for toggle switches can be found in the manufacturer’s documentation, industry standards, and online resources like Indicator Light.
Step 8: Utilizing a 3 Prong Toggle Switch in Various Applications
Introduction to Utilizing a 3 Prong Toggle Switch
A 3 prong toggle switch is versatile and widely used in various applications, ranging from simple household devices to complex industrial machinery.
Automotive Applications
3 prong toggle switches are commonly used in automotive applications, including controlling lights, fans, and other accessories in vehicles.
Marine Applications
In marine environments, 3 prong toggle switches control equipment such as navigation lights, pumps, and more. They often come with weatherproofing features.
Industrial Applications
In industrial applications, 3 prong toggle switches are utilized to control machinery, automation systems, and various process controls.
Home and Consumer Electronics
3 prong toggle switches are found in home and consumer electronics, including lighting control, small appliances, and entertainment systems.
Medical Devices
Medical devices often use 3 prong toggle switches for precision control of equipment, patient monitoring systems, and diagnostic tools.
Specialized Applications
Specialized applications of 3 prong toggle switches include aerospace, military, and other demanding environments where robustness and reliability are essential.
Step 9: How to Install a 3 Prong 12V Switch Wiring Diagram
Introduction to Installing a 3 Prong 12V Switch
Installing a 3 prong 12V switch requires understanding the wiring diagram, using appropriate tools, and following safety guidelines.
Understanding the 3 Prong 12V Switch Wiring Diagram
The 3 prong 12V switch wiring diagram typically includes three terminals: power, load, and ground. Following the diagram ensures proper connections and functioning.
Tools Required for Installation
Tools required for installing a 3 prong 12V switch include wire strippers, screwdrivers, crimpers, and multimeters. Proper tools ensure a safe and efficient installation process.
Preparing the Wires and Connections
Preparing the wires and connections involves stripping the wire ends, attaching connectors, and arranging them according to the wiring diagram.
Connecting the 3 Prong 12V Switch
Connecting the 3 prong 12V switch requires attaching the wires to the respective terminals, as shown in the wiring diagram. Proper connections ensure reliable operation.
Testing the 3 Prong 12V Switch
After installation, testing the 3 prong 12V switch with a multimeter verifies that the connections are correct, and the switch operates as intended.
Safety Precautions During Installation
Safety precautions during installation include turning off the power, using insulated tools, and following the manufacturer’s instructions and local regulations.
Common Mistakes to Avoid During Installation
Common mistakes to avoid during installation include reversing connections, over-tightening terminals, or using incorrect wire gauges. Avoiding these mistakes ensures proper functioning.
Troubleshooting the 3 Prong 12V Switch Installation
If issues arise during installation, troubleshooting may involve checking connections, verifying the wiring diagram, or inspecting for damaged components.
Benefits of Professional Installation
While DIY installation is possible, professional installation offers benefits like expertise, compliance with regulations, and assurance of proper functionality and safety.
Where to Find 3 Prong 12V Switches and Installation Services
3 prong 12V switches and professional installation services can be found through various suppliers and service providers, including platforms like Indicator Light.
Step 10: Utilizing a 2 Pin Rocker Switch Wiring Diagram
Introduction to 2 Pin Rocker Switch Wiring
2 pin rocker switch wiring is commonly used in basic on/off applications, offering a straightforward approach to controlling various devices.
Understanding the 2 Pin Rocker Switch Wiring Diagram
The 2 pin rocker switch wiring diagram consists of two terminals, one for the power source and the other for the controlled device. It provides simple and efficient control.
Tools Required for Wiring a 2 Pin Rocker Switch
Tools needed for wiring a 2 pin rocker switch include wire strippers, screwdrivers, crimpers, and a multimeter for testing the connections.
Preparing the 2 Pin Rocker Switch for Wiring
Preparing the 2 pin rocker switch for
wiring involves arranging the wires, attaching connectors, and ensuring proper alignment with the wiring diagram.
Connecting the 2 Pin Rocker Switch
Connecting the 2 pin rocker switch requires attaching the power and load wires to the respective terminals. Proper connection ensures effective operation.
Testing the 2 Pin Rocker Switch
Testing the 2 pin rocker switch after installation verifies that the connections are correct, and the switch operates as expected.
Safety Precautions When Wiring a 2 Pin Rocker Switch
Safety precautions when wiring a 2 pin rocker switch include following local regulations, using insulated tools, and adhering to the manufacturer’s guidelines.
Troubleshooting the 2 Pin Rocker Switch Wiring
Troubleshooting the 2 pin rocker switch wiring may involve checking connections, inspecting for damages, or seeking professional assistance if needed.
Benefits of Using 2 Pin Rocker Switches
2 pin rocker switches offer benefits like simplicity, cost-effectiveness, and wide applicability in various basic control applications.
Where to Find 2 Pin Rocker Switches and Wiring Information
2 pin rocker switches and wiring information can be obtained from suppliers, manufacturers, and online platforms like Indicator Light.
Step 11: How to Wire a Lighted Switch 12V
Introduction to Wiring a Lighted Switch 12V
Wiring a lighted switch 12V involves understanding the specific wiring diagram, handling illuminated components, and ensuring proper safety measures.
Understanding the Lighted Switch 12V Wiring Diagram
The lighted switch 12V wiring diagram usually includes connections for power, load, ground, and the illumination source. Following this diagram ensures correct wiring.
Tools Required for Wiring a Lighted Switch 12V
Required tools for wiring a lighted switch 12V include wire strippers, crimpers, screwdrivers, and a multimeter for testing and verifying connections.
Preparing the Wires for a Lighted Switch 12V
Preparing the wires for a lighted switch 12V involves stripping the ends, attaching appropriate connectors, and aligning them with the wiring diagram.
Connecting the Lighted Switch 12V
Connecting the lighted switch 12V requires careful attachment of the wires to the respective terminals. Proper alignment ensures both switch functionality and illumination.
Testing the Lighted Switch 12V
Testing the lighted switch 12V verifies correct connections and ensures that both the switch and illumination functions operate as intended.
Safety Precautions When Wiring a Lighted Switch 12V
Safety precautions when wiring a lighted switch 12V include turning off the power source, using proper tools, and following the manufacturer’s instructions.
Common Mistakes to Avoid When Wiring a Lighted Switch 12V
Common mistakes to avoid when wiring a lighted switch 12V include incorrect connections, mismatched components, or overlooking safety guidelines.
Troubleshooting the Lighted Switch 12V Wiring
If issues arise, troubleshooting the lighted switch 12V wiring may involve rechecking connections, verifying the wiring diagram, or replacing damaged components.
Benefits of Using Lighted Switch 12V
Using a lighted switch 12V offers benefits like visual feedback, aesthetic appeal, and improved user experience in various control applications.
Where to Find Lighted Switch 12V and Wiring Information
Lighted switch 12V and wiring information can be found at various suppliers, online platforms, and specific sites like Indicator Light, offering various models and customization options.
Conclusion
The article aims to provide valuable information for anyone interested in 3 prong toggle switches and related subjects, ensuring safe, effective, and versatile use across a wide range of applications.


