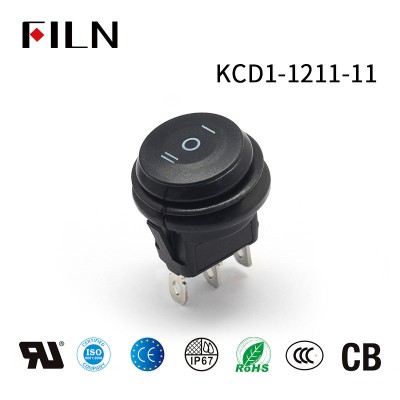
How to install the lighted toggle switch
Prepare tools and materials: You need to prepare screwdrivers, wires, wire strippers, crimping pliers, insulated tape, and other tools and materials.
Determine the installation location: Determine the switch’s installation location according to the equipment or system that needs to be controlled and use a drill to drill a suitable size installation hole.
Connect the wires: Connect the switch’s wires to the power supply line of the equipment or system that needs to be controlled. Usually, the red wireis connected to the positive power supply, and the black wire is connected to the negative power supply. The green wire is connected to the first circuit, and the yellow wire is connected to the second circuit.
Install the switch: Insert the switch into the installation hole and tighten the fixing screws to fix the switch.
Check the wiring: After installation, check the wiring carefully to ensure that the wires are connected correctly and firmly. Use insulated tape to wrap the exposed wires to prevent short circuits and ensure safety.
Test the switch: After installation, turn on the power supply and test the switch to ensure that it is working correctly. When the switch is in the first ON position, the red LED light should light up, and the first circuit should be powered. When the switch is in the second ON position, the green LED light should light up, and the second circuit should be powered. When the switch is in the OFF position, both circuits should be disconnected, and no LED lights should be lit.
In summary, the wiring method of the 15A 12V IP67 Red Green ON-OFF-ON Waterproof Boat Toggle Light Switch is relatively simple. Just follow the wiring diagram and connect the wires correctly and firmly to ensure that the switch can work correctly and reliably.